Christmas Cookies Decorating with Children
Did you know that 87% of people bake during the holidays, according to a survey of Millennials and Gen-Xers? As a mom of five, Christmas cookie decorating has become our most treasured tradition. It's not just about sweet treats—it's about building memories and watching each child's personality shine through their designs.
Yes, it's messy. The flour, icing, inevitable meltdowns—multiply that times five! But with proper preparation, simple recipes, and age-appropriate techniques, you can transform chaos into delightful family fun.
This guide covers everything: kid-friendly recipes, mess-minimizing decorating stations, and creative ideas that'll excite your children to join you in the kitchen.
If you're looking for more ways to keep the little ones engaged this season, check out our Christmas crafts for kids that pair perfectly with cookie decorating day. Trust me, after years of managing cookie decorating sessions with multiple kids of different ages, I've figured out what actually works.
This post may have affiliate links, which means I may receive commissions if you choose to purchase through links I provide (at no extra cost to you). As an Amazon Associate, I earn from qualifying purchases. Read more about these links in my disclaimer policy.
Christmas Cookies Decorating with Children
Best Cookie Recipes for Decorating with Children
Not all cookies work well for decorating with kids. The recipe matters—cookies that spread in the oven turn perfect shapes into blobs.
Classic sugar cookies are your best friend:
They hold their shape beautifully in the oven
The dough is sturdy enough for little hands to work with
They're not too sweet on their own, so you can go wild with decorations
They actually taste good (not just like edible playdough)
My go-to recipe: 1 cup butter, 1 cup sugar, 1 egg, 1 teaspoon vanilla, 3 cups flour, pinch of salt. No baking powder needed. Pull them at 9 minutes when edges barely turn golden. They should be slightly soft when they come out.

Gingerbread cookies are traditional and smell incredible—cinnamon, ginger, and cloves fill your kitchen. The dough is stickier, so chill it for at least 2 hours. Pro tip: roll between parchment paper sheets to avoid adding flour, which toughens cookies.
Recipe: 3/4 cup brown sugar, 1/2 cup butter, 1/2 cup molasses, 1 egg, 3 cups flour, and spices.
Shortbread cookies are underrated. Three ingredients: butter, sugar, flour in a 1:2:3 ratio. The buttery flavor is amazing, they're sturdy for decorating, and naturally gluten-free with rice flour.
Time-saving shortcuts:
Use refrigerated sugar cookie dough from the store
Make double batches and freeze half
Buy pre-cut shapes from bakeries and just decorate
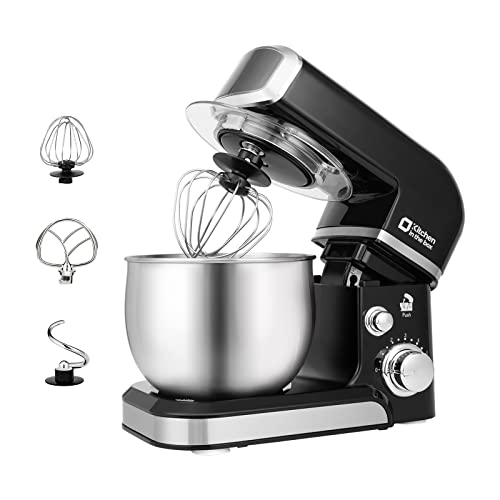
Use a stand mixer instead of hand mixing
For allergies: Bob's Red Mill gluten-free flour works 1:1 in recipes. Use flax eggs (1 tablespoon ground flaxseed + 3 tablespoons water = 1 egg) for egg-free. Swap butter for coconut oil for dairy-free.
Roll dough to 1/4 inch thick—roughly two quarters stacked—for the perfect texture.
Looking for more easy Christmas cookie recipes? We have a whole collection perfect for holiday baking with kids.
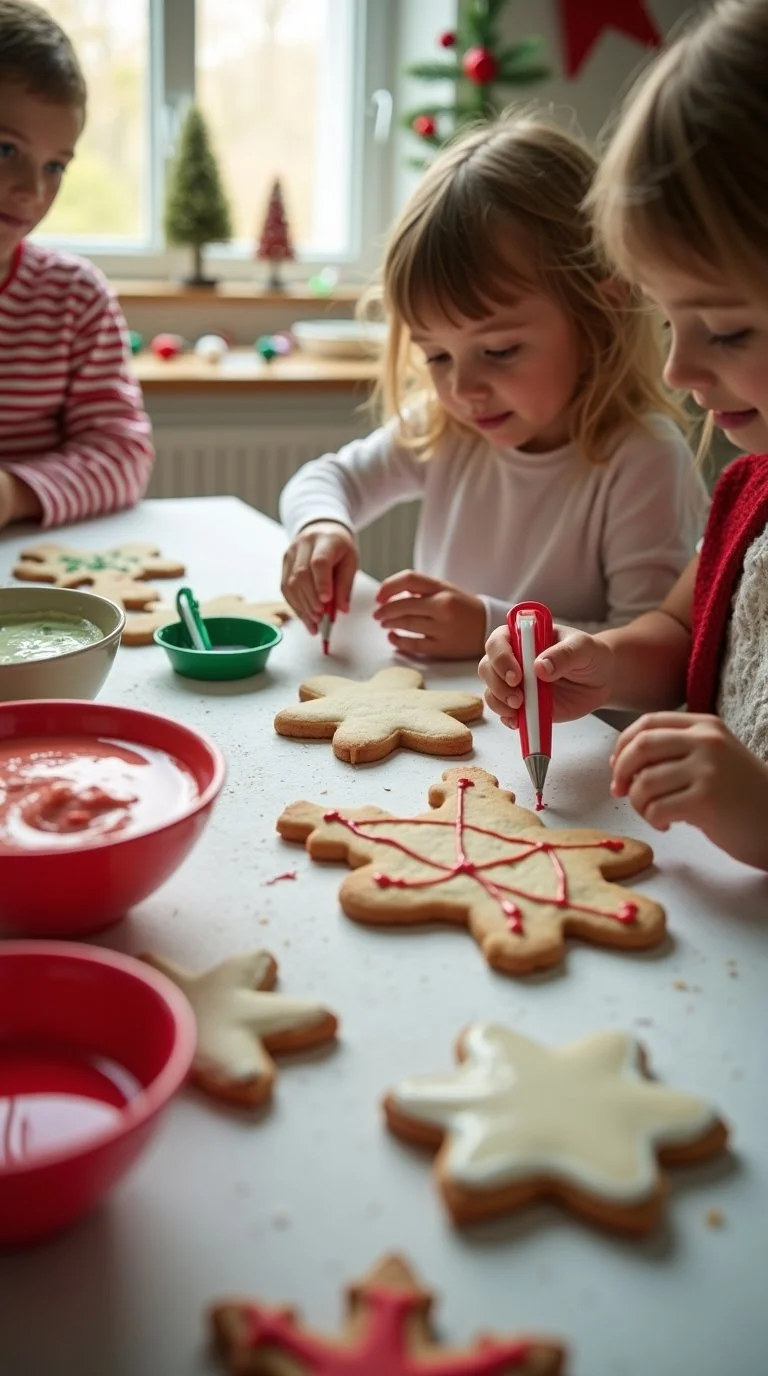
Age-Appropriate Decorating Techniques
What works for teenagers doesn't work for toddlers. Match techniques to developmental stages.
Toddlers (2-4 years):
Give them cookies already iced with a base color
Let them shake sprinkles from containers with large holes
Provide big candies they can press into icing (M&Ms work great)
Use cookie stamps before baking
Try edible markers on white icing for mess-free decorating
Control chaos by giving small portions in bowls with spoons.
Preschoolers (4-6 years):
Spreading icing with plastic knives or small offset spatulas
Squeeze bottles instead of piping bags
Making simple faces with candies (two eyes, a smile)
Creating patterns by pressing candies in rows
Dipping cookies in icing or chocolate
If you're looking for more Christmas crafts for preschoolers, we have plenty of age-appropriate activities that complement cookie decorating.
Early Elementary (6-8 years):
Piping bags with larger tips (Wilton #5 or #7)
Outline-and-flood technique
Piping basic borders and lines
Creating dots and swirls
Mixing colors to make new shades
Following simple design templates
Adding multiple layers

Expect wobbles and occasional icing explosions—it's part of the process.
Older Kids (9+):
Wet-on-wet techniques
Brush embroidery effects
3D cookie decorating
Marbling techniques
Airbrushing with food coloring
They can follow YouTube tutorials and teach themselves.
For special needs, adapt as needed. Some kids can't handle the icing texture on their hands—provide tools for everything. Limit decoration choices to 2-3 options if overwhelmed.
With mixed-age siblings, assign roles: older kids pipe outlines while younger ones add sprinkles. This activity is perfect for kid-friendly Christmas party ideas where you have children of different ages.
Essential Supplies and Tools

Cookie cutters:
Metal cutters hold shape better than plastic
Simple shapes work better than intricate ones
Aim for 3-4 inches
Skip cutters with tiny details that break off
Icing options:
Royal icing: Dries hard and smooth, looks professional. Recipe: 3 tablespoons meringue powder, 4 cups powdered sugar, 5-6 tablespoons water. Tastes chalky but looks great.
Buttercream: Tastes amazing, easy to make (butter, powdered sugar, vanilla, milk). Doesn't dry hard but perfect for immediate decorating.
Store-bought tubes: Perfect for kids. No piping bags to fill, comes in multiple colors.
Piping bags:
Disposable plastic bags (my favorite with kids)
Reusable cloth or plastic bags
Always go disposable with kids. In a pinch, use sandwich bags—snip the corner.
Decorating tools:
Offset spatulas (small, 4 inches)
Toothpicks for fixing mistakes
Small squeeze bottles for flooding
Plastic knives for spreading
Paper plates for organizing decorations
Decorations:
Sprinkles: jimmies, nonpareils, sanding sugar, edible glitter, shaped sprinkles
Candies: M&Ms, mini chocolate chips, Red Hots, candy melts, gumdrops, Lifesavers
Food coloring: Use gel colors (Americolor or Wilton)—liquid thins icing too much
Storage: Plastic containers with parchment paper between layers. Wait 24 hours for royal icing to dry before stacking. Buttercream cookies need single layers.
Setting Up Your Decorating Station
Location: Dining table works better than kitchen counter—everyone sits comfortably and can reach supplies easily.
Setup checklist:
Cover table with plastic tablecloth or silicone mat
Put a smaller mat or plate at each workspace
Set out wet washcloths for sticky hands (have 5 ready)
Fill small bowls with decorations instead of big containers
Prepare icing ahead of time
Have everything within reach but organized
Use muffin tins for organizing sprinkles—different color in each cup.
Individual decorating kits per child:
3-5 plain cookies
1-2 piping bags or squeeze bottles with icing
A small spatula or plastic knife
A few bowls of sprinkles/decorations
A plate for finished cookies
Dress code: Old oversized t-shirts worn backwards as smocks. Tie back long hair.
Set boundaries before starting:
Decorating first, eating later
One cookie at a time on your workspace
Keep sprinkles in bowls, not on the floor
Ask before using someone else's supplies
Let kids eat one cookie immediately to get it out of their system.
Create festive atmosphere: Christmas music, holiday decorations, hot chocolate for afterwards. You can also create beautiful DIY Christmas table centerpieces to make your decorating station extra special.
Creative Christmas Cookie Decorating Ideas
Classic Christmas characters:
Santa: Red icing for hat and suit, white for beard, pink/peach for face. Mini chocolate chips for eyes, Red Hot for nose.
Reindeer: Pretzel pieces for antlers, brown/tan base, candy eyes, red nose.
Snowmen: White icing, black candy eyes, orange sprinkle nose, mini chocolate chip buttons.
Elf: More detailed, better for older kids.

Winter wonderland themes:
Snowflakes: White or light blue base, silver/white sprinkles, edible glitter. Teach symmetry.
Mittens: Make matching pairs or mismatched designs.
Christmas ornaments: Circle shape, pretzel or icing loop for hanger. These also make great personalized Christmas ornaments you can create with the kids.
Christmas trees: Green icing, garland lines, candy ornaments, yellow star on top, white icing snow.
Edible cookie art:
Teach color mixing: red + yellow = orange, blue + yellow = green, red + blue = purple
Ombre effects: Start with darkest color, gradually add white
Marbling: Pipe 2-3 colors, swirl with toothpick
Personalized cookies:
Name cookies using letter cutters
Family portrait cookies on gingerbread people
These personalized treats also make wonderful DIY Christmas gifts or homemade Christmas gifts under $20 for neighbors and teachers.
Decorating challenges:
"Decorate with eyes closed"
Theme challenges ("make it as sparkly as possible")
Partner decorating
Timed challenges
Take photos before eating—cookies never last long. Consider creating Christmas family photos during your decorating session to capture these sweet memories.
Making Royal Icing Kid-Friendly
Basic Recipe:
4 cups powdered sugar (sifted)
3 tablespoons meringue powder
5-6 tablespoons warm water
1/2 teaspoon vanilla extract (optional)
Beat for 5-7 minutes until white and fluffy with stiff peaks.
Three consistencies:
Stiff: Right from mixer. For details and borders. Peak stands straight up.
Medium: Add water gradually. For piping outlines. Peak bends over.
Flood: Thin like honey. For filling areas. Smooths out in 10 seconds.
For kids, medium consistency is most versatile.
Coloring: Use gel colors, not liquid. Start tiny—grain-of-rice size.
Flavoring: Add 1/2 teaspoon vanilla, 1/4 teaspoon almond, or 1/4 teaspoon peppermint extract.
Prevent explosions:
Don't overfill bags (only halfway)
Twist top closed while decorating
Use thicker icing
Consider squeeze bottles
Quick-dry tricks:
Place near a fan on low
Use food dehydrator
Warm oven (100°F) with door cracked
Make icing thicker
Add extra meringue powder
Still takes 2-4 hours minimum.
Storage: Refrigerate up to 2 weeks in airtight container. Freeze up to 3 months.
Alternatives:
Buttercream: 1/2 cup butter, 2 cups powdered sugar, 1 teaspoon vanilla, 2-3 tablespoons milk. Sweet and creamy.
Cream cheese frosting: 8 oz cream cheese, 1/4 cup butter, 2 cups powdered sugar, 1 teaspoon vanilla.
Canned frosting: Works in emergencies.
Check out more easy holiday baking with kids ideas if you want to expand your holiday baking activities beyond cookies.
Managing the Mess
Cookie decorating with kids is messy. But it doesn't have to take hours to clean up.
Clean as you go: Set a timer for every 15 minutes. Quick cleanup:
Wipe hands with damp washcloths
Pick up dropped sprinkles
Wipe obvious spills
Check faces for icing
For icing spills: Grab paper towels immediately, scoop up excess. Use damp cloth with dish soap. Royal icing is water-soluble when wet.
For sprinkles: Vacuum them up. Sweeping spreads them around.
Teaching cleanup responsibility:
Toddlers (2-4): Throw away paper towels, help with lids, wipe their area
Preschoolers (4-6): Wash hands independently, wipe tables, sweep sprinkles
Elementary (6-10): Wash dishes, put away supplies, thorough cleanup
Older kids (10+): Clean entire workspace independently
Clothing stains: Scrape off excess, rinse under cold water from back side. Use stain remover for food coloring. Never use hot water first—it sets stains.
Quick surface cleaning: Warm water with dish soap. For dried royal icing, soak with warm damp cloth first. Magic Erasers work great.
Make cleanup fun:
"Who can pick up most sprinkles in 1 minute?"
Race to clean areas fastest
Music during cleanup
"Can't eat cookie until cleanup done" rule
Minimizing waste:
Use broken cookies for crumbs, pie crusts, or cookie truffles
Use leftover icing for graham crackers or as edible glue
Accept mess will happen—plan for it with covered surfaces and cleaning supplies ready.
Frequently Asked Questions
What age is appropriate to start decorating cookies with children?
Children as young as 18 months can shake sprinkles or press candies. Ages 4+ can handle piping bags. Match tasks to developmental stage and gradually increase complexity.
How do I prevent the mess from getting completely out of control?
Use mats or tablecloths, give each child their own space, and provide small portions. Keep washcloths ready and do quick cleanups every 10-15 minutes. Involve kids in cleanup.
Can I use store-bought cookies and icing for decorating with kids?
Absolutely. e-bought supplies are perfect for beginners or when short on time. The experience matters more than homemade versus store-bought.
How long should I expect a cookie decorating session to last?
Toddlers: 20-30 minutes. Elementary kids: 45-60 minutes. Older kids: 1-2 hours. Add 30-60 minutes for setup and cleanup. Stop before it stops being fun.
What's the best way to dry decorated cookies quickly?
Use a fan on low or a warm oven (100°F) with door cracked for 15-20 minutes. Royal icing naturally dries in 6-8 hours. Don't stack until completely dry.
How can I make cookie decorating more inclusive for children with allergies?
Use alternative ingredients and read all labels carefully. Ask about allergies beforehand, label ingredients, and keep stations separate to avoid cross-contamination.
What should I do with all the decorated cookies we make?
Eat some, gift most to neighbors and teachers, freeze extras, or donate to shelters. Delivering cookies teaches kids generosity.
Final Thoughts
Decorating Christmas cookies with children creates lasting family memories worth every messy moment. We've covered recipes, techniques, and creative ideas—but remember, connection matters more than perfection. Those wonky snowmen are beautiful because your child made them with love. Even disasters become treasured stories.
Don't stress about using shortcuts or imperfect results; let kids create freely. Twenty years from now, they won't remember what cookies looked like—they'll remember the warmth, laughter, and joy of creating together. Pick a date this week and start your tradition. Make messy, beautiful, totally imperfect Christmas memories. Happy decorating!