30 Adorable DIY Baby Shower Favors Ideas That Guests Will Actually Love
Did you know the average host spends over $200 on party favors? As a mom of 5, I've attended and hosted countless baby showers, and I can tell you that guests don't need another generic candle gathering dust on their shelf - they'll treasure thoughtful, handmade favors that come straight from your heart.
From my experience planning showers for friends and family, DIY baby shower favors ideas save money while adding that personal touch that makes your celebration unforgettable. Whether you're crafting for 10 intimate friends or 50 family members, these creative ideas will have everyone talking and make your shower truly memorable.
When planning your perfect celebration, thoughtful favors are just one piece of the puzzle - you'll also want to consider fun baby shower games to keep guests entertained and delicious food ideas to complement your handmade treats and stunning cakes ideas as well.
Don't forget to check our complete baby shower planning guide to ensure every detail is covered.
This post may have affiliate links, which means I may receive commissions if you choose to purchase through links I provide (at no extra cost to you). As an Amazon Associate, I earn from qualifying purchases. Read more about these links in my disclaimer policy.
Sweet Edible DIY Baby Shower Favors IDEAS
Let me share something I've learned: edible favors are often the most appreciated. I discovered this after spending hours making picture frames that probably ended up in junk drawers. Food favors get eaten and remembered fondly.

Mini mason jar honey pots are my go-to favor for good reason. You can buy raw honey in bulk from Costco for about $12, which makes roughly 20 small jars. I add wooden honey dippers (50 for $8 on Amazon) and create custom labels on my computer. The whole setup costs under $1.50 per favor.
Here's what works best for edible baby shower favors:
Homemade sugar cookies shaped like baby bottles, onesies, or rattles - use royal icing in pastel colors
Chocolate-covered pretzel rods that look like baby rattles when you dip the ends in white chocolate and add sprinkles
Individual popcorn bags in pink, blue, or yellow - I use brown lunch bags and jazz them up with washi tape
Mini cupcakes in clear boxes with custom toppers featuring the baby's name or due date
Homemade fudge squares wrapped in cellophane - vanilla fudge with food coloring works great
Custom tea bag favors with pregnancy-safe herbal blends like chamomile or peppermint

The trick with cookies is making them 2-3 days ahead and storing them in airtight containers. Don't make my mistake of baking 40 cookies the night before - I was up until 2 AM decorating those little onesies.

A helpful tip: Buy cookie cutters from the dollar store. You don't need fancy ones, and you'll save $20-30.
Adorable Keepsake DIY Favor Ideas
Keepsake favors are tricky because you want something people will actually keep, not toss in a drawer. I've made my share of crafty disasters that looked cute but served no real purpose.
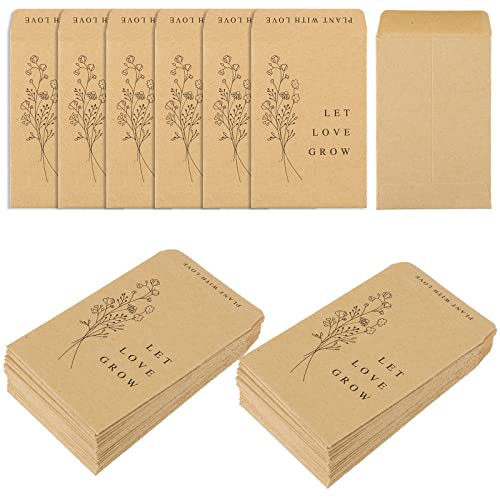
Personalized seed packets are both meaningful and cost-effective. I buy baby's breath seeds in bulk online (about $15 for enough to make 50 packets) and design custom envelopes on my computer. The symbolism works perfectly - watching something grow, just like the new baby.
My favorite keepsake ideas that actually work:
Mini succulent plants in small terracotta pots that you decorate with acrylic paint
Custom photo frames made from popsicle sticks - sounds basic, but they're surprisingly cute when done right
Handmade soap bars shaped like baby blocks using silicone molds and essential oils
Mini canvas tote bags with hand-painted designs - iron-on transfers work too if you're not artistic
Bookmark favors with baby quotes and colorful tassels - speaking of meaningful quotes, check out these inspirational first-time mom quotes that could work perfectly on bookmarks
Small wooden blocks that spell "BABY" or the child's expected name

The succulent idea came from a shower I attended where I kept mine for three years. It lived on my kitchen windowsill and always reminded me of that sweet celebration. That's the kind of lasting impression you want to create.
Just be realistic about your crafting skills. I once attempted hand-painted canvas bags for 25 people and ended up with something that looked like a toddler's art project. Sometimes simple really is better. If you're planning ahead for your little one's arrival, our first-time mom tips can help you prepare for what's coming next.
Budget-Friendly DIY Favors Under $2 Each
Let's talk money. When you're already spending on food, decorations, and games, favor costs can get out of hand fast. These ideas keep things affordable without looking cheap.
Homemade lip balm is surprisingly easy and costs about $0.75 per favor. You need beeswax, coconut oil, and small containers from Amazon. I make vanilla or berry flavors, and guests love getting something they'll actually use. The key is buying supplies in bulk - don't get those tiny craft store containers that cost $2 each.
Here are my tried-and-true budget winners:

Tea light candles in baby food jars - clean the jars thoroughly, add candle wax and wicks
Origami baby booties from patterned scrapbook paper - YouTube tutorials make this easier than it sounds
Mini bath salt sachets in organza bags with custom thank you tags
Decorated matchboxes filled with mints or small candies
Paper bag favors filled with homemade trail mix and tied with ribbon
Handwritten recipe cards for "growing a family" with herb seeds attached
The matchbox idea was born out of desperation when I ran out of favor boxes two days before a shower. I bought plain matchboxes from a craft store, covered them with decorative paper, and filled them with chocolate-covered almonds. Total cost: $0.89 per favor, and they looked intentionally vintage.
Don't overthink the packaging. Sometimes a simple brown bag with a pretty ribbon beats an expensive box. Your guests care more about the thought than the fancy wrapping. Just like when baby arrives, simple solutions often work best - whether it's gentle sleep training methods or basic comfort techniques.

Gender-Neutral DIY Baby Shower Favors
Not every shower reveals the baby's gender, and honestly, neutral favors are often more practical anyway. These ideas work for any celebration and tend to have broader appeal.

Vanilla-scented play dough in small mason jars with wooden tools is pure genius. Kids and adults both love it, and the vanilla scent is so much better than that artificial play dough smell. I make mine with flour, salt, cream of tartar, and vanilla extract - costs about $0.50 per jar. This actually gives me ideas for DIY baby toys from household items once your little one arrives!
My go-to neutral favor options:
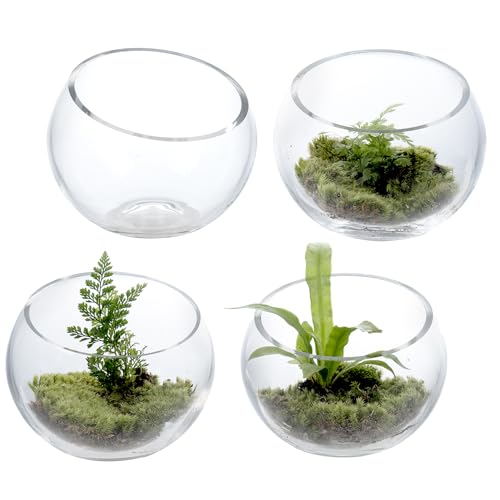
Mini terrariums in glass containers with moss and tiny figurines
Homemade granola bars wrapped in parchment paper with twine
Decorated clothespins for hanging baby photos - paint them in soft yellows or greens
Small potted herbs like basil or mint with care instruction cards - these herbs will come in handy later when you're exploring first foods for baby-led weaning
Handmade bookmarks featuring neutral animal designs
Mini bottles of homemade vanilla extract with custom labels
The herb idea is fantastic because it serves double duty - guests get something useful, and the mom-to-be gets a head start on baby-safe herbs for cooking. I learned this from a friend who grows her own basil and makes incredible pesto.

Vanilla extract favors take about 6 weeks to properly develop flavor, so start early. I use small glass bottles from Amazon and real vanilla beans. It's more expensive upfront but creates a truly special favor that people remember years later.
Creative Packaging Ideas for DIY Favors
Here's where you can really make even simple favors look amazing. I used to think packaging didn't matter much until I saw the same cookies I'd made presented two different ways - night and day difference.
Clear cellophane bags are your best friend. They're cheap, show off your creation, and look professional when tied with satin ribbon. I buy the ribbon on sale at craft stores - 50% off sales happen constantly if you're patient.
Packaging options that always work:

Mini kraft paper boxes with window cutouts - stamp them with baby-themed designs
Organza pouches with drawstring closures and thank you tags
Glass mason jars with chalkboard labels and chalk markers for guests to write notes
Brown paper lunch bags decorated with washi tape and cute stickers
Small white boxes with belly band wraps featuring baby motifs
Fabric favor bags sewn from coordinating baby shower fabrics

The mason jar idea with chalkboard labels was a happy accident. I ran out of regular labels and grabbed chalkboard stickers instead. Guests loved writing little messages on them, and it became an interactive element I hadn't planned.
Don't go overboard with packaging costs - they can easily exceed the favor cost itself. Set a budget for packaging and stick to it. A $0.25 bag with a $0.10 ribbon still looks great.
Time-Saving Tips for Making DIY Baby Shower Favors
Let's be real - DIY favors can become overwhelming if you don't plan properly. I once stayed up until 3 AM the night before a shower, frantically hot-gluing ribbon onto 30 favor boxes. Learn from my mistakes.
Batch preparation is everything. Don't try to complete one favor at a time. Instead, do all cutting first, then all assembly, then all packaging. It's much more efficient and keeps you from getting bored or frustrated.
Essential supplies to stock up on:
Good scissors - cheap ones will make you crazy
Double-sided tape - cleaner than glue for most projects
Ribbon in neutral colors - works for any theme
Labels and label maker - consistent text looks professional
Storage containers - keep finished favors safe until party day
Backup supplies - always buy 10% extra materials

Make-ahead timeline that actually works:
3-4 weeks before: Order supplies, plan designs
2-3 weeks before: Start non-perishable favors
1 week before: Finish assembly, start packaging
2-3 days before: Make any edible items
Day before: Final quality check and arrange display
The key is involving others. Turn favor-making into a fun crafting party with friends or family. Order pizza, put on a good movie, and make it social. You'll get done faster and actually enjoy the process.
Always have a backup plan. Keep some nice store-bought chocolates on hand just in case your DIY project doesn't turn out as expected. It's better to have a simple backup than to stress about perfection.
Frequently Asked Questions
How far in advance should I start making DIY baby shower favors?
Start 2-3 weeks before the shower for most items, but make perishable goods like baked treats only 2-3 days ahead. This prevents last-minute rushing.
How many favors should I make for my baby shower?
Make one favor per guest plus 2-3 extras. For couples attending together, one favor per couple is sufficient rather than per individual.
What are the easiest DIY baby shower favors for beginners?
Try decorated mason jars with treats, personalized seed packets, or homemade cookies in clear bags. These look professional but require minimal crafting skills.
Should DIY baby shower favors match the party theme?
Matching creates cohesion but isn't essential. Focus on favors that reflect the mom-to-be's personality and that guests will actually use and appreciate.
Conclusion
DIY baby shower favors add a personal touch while saving money and creating meaningful keepsakes your guests will treasure. The best favors come from the heart - they don't need to be perfect, just made with love.
Start early, enjoy the process, and don't hesitate to involve friends and family in a fun crafting session. Pick 2-3 favorite ideas, gather your supplies, and trust that your creativity will create something truly special for this milestone celebration.