Stunning Festive Holiday Wreath DIY
Have you ever admired a beautifully decorated home and wished you could create something that stunning? As a mom of 5, I felt the same way until I started making my own decorations. Here’s the truth: About 74% of adults say homemade Christmas decorations mean more to them than store-bought ones.
Creating your own festive holiday wreath diy isn't just about saving money—it's about crafting something uniquely yours. From my experience making wreaths for our doors and as teacher gifts, I've learned what actually works. In this guide, you'll discover professional techniques, budget-friendly options, and creative ideas to elevate your holiday décor.
And if you're looking for more seasonal inspiration, be sure to check out our Christmas crafts for kids and crafts for kids guides for fun family projects to enjoy together.
This post may have affiliate links, which means I may receive commissions if you choose to purchase through links I provide (at no extra cost to you). As an Amazon Associate, I earn from qualifying purchases. Read more about these links in my disclaimer policy.
Festive Holiday Wreath DIY: Let’s get started
Essential Materials and Tools for Your Holiday Wreath Project
You don't need to spend a fortune to get started. Your base is the foundation of your wreath, and choosing the right one depends on your desired style. Wire wreath frames are perfect for beginners—they're forgiving and usually cost $3-$8 at craft stores. Grapevine wreaths provide rustic farmhouse appeal. Foam rings work well for ornament-heavy designs, and straw bases are ideal for fresh greenery since they retain moisture.
You'll need these four essential tools:
Wire cutters – Heavy-duty ones for cutting floral wire effectively
Floral wire – Green 22-gauge wire blends seamlessly and holds most decorations
Hot glue gun – An affordable option works just as well as premium versions
Pruning shears – Essential for cutting fresh greenery cleanly
Fresh evergreen wreaths offer wonderful fragrance but typically last only 3-4 weeks even with daily misting. Artificial greenery has improved significantly—quality options look remarkably realistic and last for years. Plus, it's reusable and budget-friendly over time.
For ribbon selection, use at least 2.5-inch width for standard 18-inch wreaths, though 4-inch wired ribbon creates the most dramatic bows. Wired edges maintain their shape well. Mix textures like velvet, burlap, and satin for visual interest.
Budget Breakdown (for an 18-inch wreath):
$15 Budget: Wire frame ($4), artificial greenery ($5), one roll of ribbon ($3), pinecones from your yard (free), basic ornaments ($3)
$30 Budget: Better quality frame ($6), mixed artificial greenery ($12), premium ribbon ($6), variety of ornaments and picks ($6)
$50+ Budget: Grapevine or specialty base ($10), high-end realistic greenery ($20), luxury ribbon ($10), unique decorative elements ($10+)
Choosing the Perfect Wreath Style for Your Home's Aesthetic
Your wreath should reflect your personal taste first, then complement your home's exterior.
Traditional evergreen wreaths feature pine, fir, and cedar arranged in a full, lush style. Mixing different evergreen varieties creates a varied texture. Fraser fir has upward-facing needles that catch light beautifully, cedar adds tiny scale-like leaves that fill gaps, and noble fir creates attractive layers.
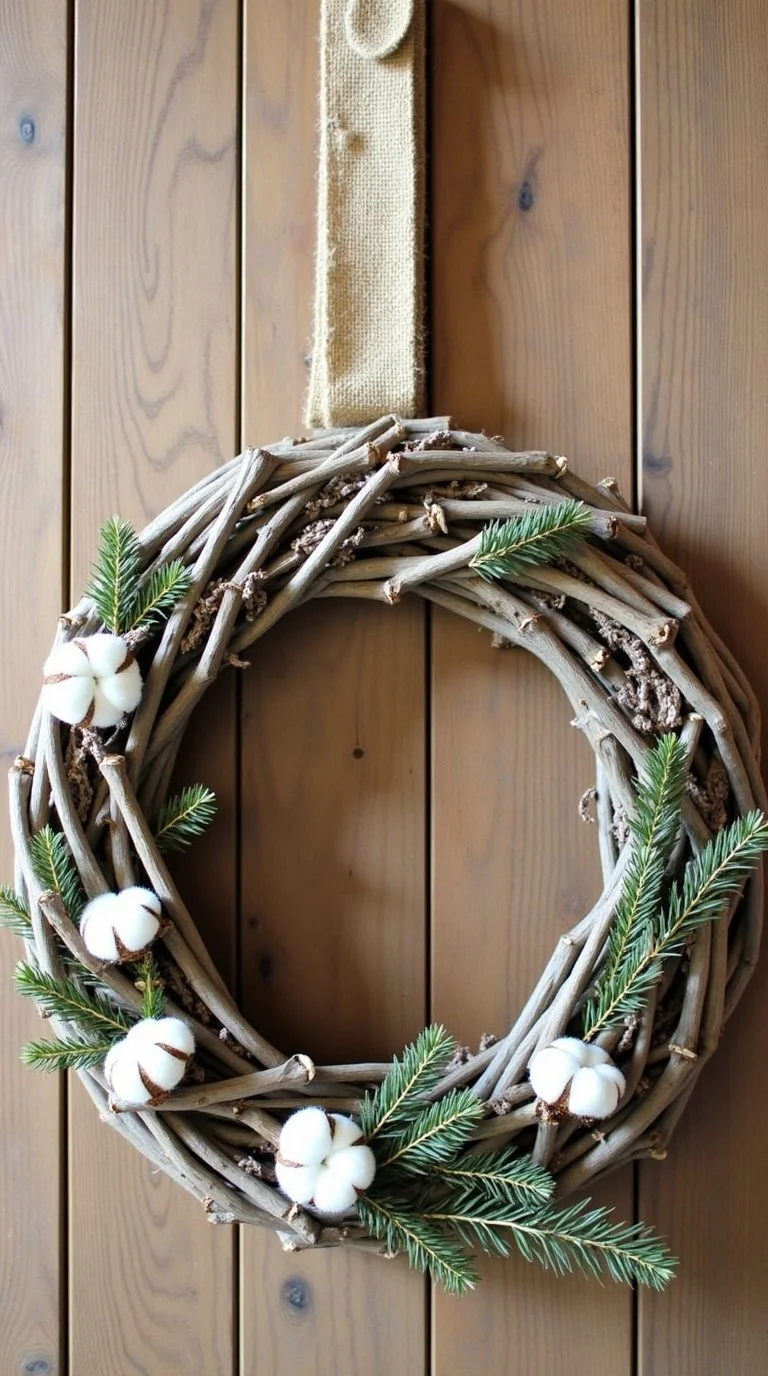
Rustic farmhouse styles are forgiving for beginners. They incorporate burlap ribbon, cotton stems, and natural wood elements. The aesthetic embraces slight imperfections rather than rigid symmetry.
Modern minimalist wreaths emphasize clean lines, limited color palettes (one or two colors maximum), and generous negative space. Consider simple eucalyptus with a single velvet ribbon, or a wire frame with strategically placed white ornaments.
Whimsical wreaths feature bright non-traditional colors and playful elements like jingle bells, candy canes, or small decorative toys. These designs work beautifully for Christmas crafts for kids activities and can be adapted for kid-friendly Christmas party ideas.
Elegant formal wreaths utilize luxurious ribbons, metallic accents in gold or rose gold, and sophisticated arrangements with a defined focal point, typically at the bottom.
Theme ideas to consider:
Winter wonderland (white and silver with artificial snow)
Santa's workshop (miniature tools, candy canes, red and white)
Scandinavian hygge (natural wood, white, simple greenery)
Woodland creatures (small deer figures, mushrooms, earthy tones)
Candy land (pastel colors, wrapped candies, sweet elements)
Matching your wreath to your home: Red brick pairs well with traditional green and red or deep burgundy and gold. White siding accommodates most color schemes, though jewel tones provide excellent contrast. Dark siding displays bright colors and metallics more effectively. Modern architecture suits minimalist designs, while cottage-style homes complement rustic wreaths.
For more ideas on coordinating your entire home's festive look, explore these DIY Christmas home decorations and Christmas tree decorating ideas.
Step-by-Step Guide to Creating a Classic Evergreen Wreath
Proper workspace setup is essential. You'll need good lighting, a large flat surface, and all materials within reach. Protect your surface with newspaper, as this process involves pine needles, glue, and wire pieces.
For fresh greenery, cut branches the same day or day before assembly. Cut at an angle and keep in water until ready. Each bundle should measure 6-8 inches long. Strip the bottom 2-3 inches of needles to create a clean stem for attachment.
Method for securing greenery: Start with your frame laying flat. Position your first bundle at a 45-degree angle against the frame. Use floral wire to wrap around stems and frame at least three times, pulling firmly. Keep the wire continuous—you'll use the same piece throughout.
The overlapping technique is crucial. Position your second bundle over the stems of the first, maintaining the same angle. Wrap with wire three times. The second bundle's greenery should conceal where you attached the first. Continue around the entire wreath. When you return to the start, tuck the last bundle under the first and secure.
Create depth by incorporating three different greenery types. Use pine as your base layer, add cedar or fir for textural variety, then introduce silvery-blue elements like blue spruce for contrast. Layer at varying angles to avoid a flat appearance.
Check balance by stepping back approximately 10 feet. If one side appears thinner, add more greenery. If you can see the frame through gaps, fill those areas. Your wreath should appear equally full from all angles.
Heavy items like large pinecones require floral wire wrapped multiple times around both the object and the frame itself. Lighter items like small berries work well with hot glue applied to stable elements.
For final adjustments, fluff greenery by gently separating clumped branches. Trim any stems protruding at awkward angles. Rotate slowly and inspect for gaps or thin spots.
Creative Embellishment Techniques That Make Your Wreath Stand Out
Ribbon placement: The simplest method involves creating a single loop bow and wiring it to the bottom. For a cascading effect, use 3-4 yards of ribbon, create a bow at the top or side, then allow long tails to cascade downward. Twist the ribbon as it falls to display both sides.
Creating bows: The "florist bow" method involves making loops with your ribbon while pinching the center each time, alternating sides. Aim for 4-6 loops total. Secure the center with floral wire, fluff the loops, and trim tails at an angle.

The rule of three: Group three different-sized ornaments together in one area rather than spacing them evenly. This creates a focal point that draws the eye. Place your main decorative cluster at the bottom center or slightly off to one side, then add smaller elements around the perimeter for balance. You can even incorporate personalized Christmas ornaments to make your wreath extra special.
Natural elements to collect:
Pinecones (soak overnight, then bake at 200°F for 2 hours to eliminate insects)
Interesting seed pods
Dried berries (research toxicity before handling)
Small branches with appealing shapes
Dried flowers from previous seasons
Consider spray painting natural elements for added elegance. Gold-finished pinecones create a premium appearance.

Adding lights: Use battery-operated fairy lights with thin copper wire for flexibility. Begin from the back and weave through the greenery, securing every 6 inches with floral wire or twist ties. Conceal the battery pack on the wreath's back. For safety considerations, especially if you have little ones around, check out these holiday decorations toddler safe tips and Christmas lights safety tips.
Texture mixing creates professional-looking results. Combine smooth elements (glass ornaments), rough textures (burlap or pinecones), shiny surfaces (metallic accents), and matte finishes (dried flowers or unglazed ceramics).
Unexpected additions: Vintage brooches from thrift stores, small photo frames, antique jingle bells, or decorative keys add personal character and storytelling elements to your wreath.
Preserving and Maintaining Your DIY Holiday Wreath
Fresh wreaths require daily attention. Mist with water every morning using a spray bottle, ensuring thorough coverage, especially on the underside where stems are exposed. Indoor wreaths in heated environments may require misting twice daily.
Outdoor wreaths face environmental challenges. Secure all elements with extra floral wire and apply clear acrylic sealer spray to fabric ribbons and paper decorations. Bring wreaths inside during severe weather conditions. For comprehensive guidance on displaying your wreath beautifully, explore these Christmas wreath ideas for front door and outdoor Christmas light ideas.
Storing artificial wreaths: Use dedicated plastic wreath storage containers with lids (approximately $15 at major retailers). If unavailable, use a large plastic bag with bubble wrap stuffed in the center to maintain shape. Remove delicate elements that might get crushed. Store flat or hanging, never compressed under other items.
Mid-season refreshing: If your fresh wreath begins to look tired, add new elements. Incorporate fresh pine sprigs, attach a new bow, or wire on fresh ornaments. For artificial wreaths, fluff the greenery and replace the ribbon.
Extending fresh wreath longevity to 4-6 weeks: Keep in the coldest available location—covered north-facing porches are optimal. Avoid direct sunlight, which accelerates drying. Apply anti-desiccant spray like Wilt-Pruf to slow moisture loss.
Transitioning through holidays: Begin with a neutral evergreen base and simple burlap or cream ribbon. For Thanksgiving, add small pumpkins and fall picks. Transition to red and green elements for Christmas. After Christmas, incorporate silver snowflakes for a winter theme through January.
Eco-friendly disposal: Remove all wire, ribbon, ornaments, and synthetic materials first. Break the wreath into smaller pieces and add to compost or yard waste collection. Many municipalities offer Christmas tree recycling programs that accept wreaths. For more sustainable holiday ideas, visit our guide on green Christmas ideas eco-friendly.
Budget-Friendly Holiday Wreath Ideas Under $20
Dollar store approach: Purchase a wire wreath frame ($1.25), three bunches of artificial pine ($3.75), two packs of ball ornaments ($2.50), ribbon ($1.25), and pinecone picks ($1.25). Total investment: $11.25 before tax. Attach pine with included wire or twist ties, hot glue ornaments in clusters, and create a simple bow.
Foraging provides free materials. Collect pinecones, interesting branches with berries (properly identify plants first), seed pods, and dried leaves to spray-paint. Use public spaces or your own property respectfully.
Upcycling household items: Transform old Christmas cards into decorative shapes, repurpose fabric scraps as ribbon, and convert old jewelry into ornaments. Leftover gift-wrapping ribbon works perfectly for accent bows. For more budget-conscious crafting inspiration, check out homemade Christmas gifts under 20 and budget Christmas gifts for toddlers.
Simple designs often prove most striking. A plain grapevine wreath with one substantial bow creates visual impact. Similarly, an evergreen wreath featuring only white ornaments demonstrates that restraint can be elegant.
Creating your own embellishments: Hot glue small ornaments or beads to wooden picks or skewers. Spray paint collected branches. Craft felt flowers using online templates. Fashion berry picks using red wooden beads and floral wire. These techniques are perfect for holiday crafts toddler friendly activities.
Group crafting gatherings reduce costs. Bulk-purchase materials and divide expenses among participants. Share tools and benefit from collaborative problem-solving. Consider hosting a fun Christmas party where everyone makes wreaths together.
Off-season shopping: Purchase ribbon, ornaments, and picks immediately after Christmas at 75-90% discounts. During mid-summer clearance sales, stock up for the following year.
Advanced Wreath-Making Techniques for Experienced Crafters
Custom shapes: Oval wreaths suit tall narrow doors effectively. Square wreaths convey modern aesthetics—create them using four wooden dowels wired at corners. Asymmetrical designs where one side features fuller coverage create dynamic visual interest.
Double and triple layer wreaths add dimensional depth. Create two wreaths and attach one inside the other using different diameters—such as 16-inch outer and 10-inch inner rings. Stagger greenery placement so the inner wreath remains visible.
Incorporating live elements: Succulents attach with floral wire and moss but require regular misting. Air plants are more manageable—simply wire them in place. Herbs like rosemary and thyme provide fragrance and can be harvested for culinary use.
Professional wire wrapping techniques: Florists often use floral tape in addition to wire. Wrap wire around stems, then cover with floral tape to conceal the wire and improve grip. This method provides cleaner appearance and enhanced security.
Working with challenging materials: Driftwood requires wiring individual pieces to a frame before adding shells and starfish. Metal elements need stronger wire or zip ties for secure attachment. Unconventional bases like vintage picture frames or embroidery hoops require creative approaches to greenery attachment.

Creating movement: Incorporate long ribbon tails that sway with air currents, suspend ornaments on thin wire so they dangle freely, or add cascading beaded garland. Long pheasant feathers respond to minimal air flow for dramatic effect.
Thematic integration tells cohesive stories. Rather than random holiday elements, develop specific narratives. A "Night Before Christmas" wreath might feature tiny mice, miniature books, and stockings. A "Winter Forest" theme could incorporate deer, owls, mushrooms, and woodland elements.
Consider coordinating your wreath with other festive touches like DIY Christmas table centerpieces and cozy holiday home decor ideas to create a cohesive look throughout your home.
Frequently Asked Questions
How long will a fresh evergreen wreath last?
Fresh wreaths last 3-4 weeks with proper care. Mist daily and keep cool. Indoor wreaths last 2-3 weeks; outdoor wreaths in cool climates can last up to 6 weeks.
What's the best base for beginners?
Wire wreath frames—they're affordable, easy to use, and show clear attachment points. Grapevine wreaths are also beginner-friendly for rustic styles.
Can I make a wreath without a hot glue gun?
Yes. Floral wire provides secure attachment and easy adjustments. Twist ties, pipe cleaners, or zip ties also work well.
How do I hang a wreath without damaging my door?
Use an over-the-door hanger, removable adhesive hooks, magnetic hooks (for metal doors), or Command hooks rated for 5+ pounds.
What's the difference between a $20 wreath and a $100 wreath?
Material quality, density, and embellishments. Expensive wreaths feature premium materials and fuller coverage, but you can achieve professional results at any budget.
Can I make a wreath that lasts through multiple holidays?
Yes. Create a neutral base with simple ribbon, then use removable decorations that swap easily for each season.
How do I make my wreath look fuller without buying more materials?
Layer greenery at different angles, fluff branches, add filler like baby's breath, work in overlapping layers, and move branches from the back to front areas.
Wrapping It Up
Creating your own holiday wreath is a meaningful tradition that adds warmth and personality to your home. Whether you choose classic evergreen or modern styles, what matters most is that your creation reflects your taste and brings you joy.
Start with basic techniques, trust your creativity, and don't hesitate to experiment. Gather your materials and begin crafting—your ideal wreath is within reach. You might find yourself making seasonal variations, gifting them to loved ones, or even starting a small business.
The most rewarding moment comes when you see your finished wreath welcoming guests at your door. Share your creations using #MyDIYHolidayWreath. Happy crafting!