How to Plan a First Birthday Party
Congratulations. Your baby is turning ONE. This meaningful milestone deserves a special celebration, but I understand how overwhelming it can feel to plan the perfect party. According to recent surveys, 68% of parents experience stress when planning their child's first birthday. As a mom of 5 who has planned numerous first birthday party over the years, I've gathered valuable insights about what truly works and what doesn't.
Whether you're considering a small family gathering or a larger celebration, I'll guide you through each stage so you can actually enjoy the process while creating wonderful memories that you'll cherish just as much as I've cherished my children's special days.
This post may have affiliate links, which means I may receive commissions if you choose to purchase through links I provide (at no extra cost to you). As an Amazon Associate, I earn from qualifying purchases. Read more about these links in my disclaimer policy.
How To Plan a First Birthday Party: Step-by-Step Guide

Step 1: Set Your Budget and Timeline (8-12 Weeks Before)
The first step is determining how much you're willing to spend. First birthday parties can become unexpectedly expensive without established limits. I learned this through experience when I exceeded my planned budget for my daughter's party.
Here's what to do at this stage:
Calculate your total budget and break it down by category (venue, food, decorations, cake, photos)
Create a planning calendar with all your deadlines for organization
Choose between weekday or weekend based on guest availability
Select a date close to your baby's actual birthday (while considering family travel needs)
Work around your child's nap schedule to ensure they're well-rested for the celebration
Start a planning folder to keep everything organized (digital or physical)

Budget planning may not be the most exciting aspect, but it's essential. You don't want to overspend on a celebration your child won't remember.
When planning my son's first birthday, establishing clear spending limits helped me prioritize what mattered most - quality food and photography - while saving on decorative elements.
Step 2: Develop Your Guest List and Choose a Venue (6-8 Weeks Before)
Now it's time to determine attendance and select an appropriate location. Your guest count will significantly influence venue selection. For my daughter's celebration, we invited approximately 40 people and quickly realized our apartment wouldn't be suitable.
Start by creating your guest list:
Include family, close friends, and any baby companions your child enjoys
Establish a reliable headcount to help select the appropriate venue size
Consider venue options based on your budget (home, park, community center, restaurant)
Book external venues promptly as desirable locations fill quickly, particularly on weekends
For home celebrations, consider any necessary rearrangements
Always prepare a contingency plan for outdoor venues - I gained this insight when rain disrupted my niece's park celebration

I've hosted parties at home, in parks, and once at a community center. Each option presents advantages and disadvantages.

Home venues are more economical but require more cleanup. Parks are affordable but weather-dependent.

Dedicated venues cost more but typically handle setup and cleanup. Whatever you choose, ensure it's child-friendly with adequate space for young guests to move around safely.
Step 3: Select a Theme and Send Invitations (4-6 Weeks Before)
Selecting a theme simplifies decoration and planning considerably. While your one-year-old may not appreciate themes yet, they help create cohesion and enhance photographs.
My son showed interest in his stuffed elephant, so we implemented a jungle theme that worked wonderfully.

For themes and invitations:
Choose something your baby seems to enjoy or that has meaning for your family
Consider popular 2025 themes like woodland animals, space adventure, or tropical luau
Select colors and designs that complement your theme
Send invitations with essential details (date, time, location, RSVP deadline)
Digital invitations simplify RSVP tracking - we used Paperless Post with great success
Be clear about gift preferences if applicable (books only, no gifts, etc.)
Create a group communication channel for updates and reminders

I spent considerable time creating handmade invitations for my first child's party and received minimal acknowledgment. For my second child, I used digital invitations that required minimal setup time.
Both celebrations were equally successful, but one created significantly less stress. Sometimes efficiency is worth prioritizing.
Step 4: Plan the Menu and Order the Cake (3-4 Weeks Before)
Food planning is crucial because you need options suitable for both children and adults. The birthday cake also requires attention - you'll need a special "smash cake" for your baby and a larger cake for guests.
Your food planning approach:
Decide on your meal style - finger foods are particularly effective for mixed-age gatherings
Plan a menu with baby-friendly options alongside appealing adult selections
List serving items you'll need (plates, utensils, cups, napkins)
Order the birthday cake and smash cake, or plan to make them yourself
Consider any allergies or dietary restrictions among your baby and guests
Calculate quantities based on your confirmed guest count and party duration
Order any specialty food items that align with your theme
When ordering my daughter's cake, I neglected to specify "no artificial dyes" and received a cake with bright blue frosting that caused staining issues. Learn from my experience and communicate specific requirements to your baker.

For my son's celebration, I prepared a simple banana cake for his smash cake - a healthier option that prevented sugar-related meltdowns.
Step 5: Purchase Decorations and Supplies (2-3 Weeks Before)
Now for the enjoyable part - shopping. Decorations transform your space and create an attractive backdrop for photography. You don't need excessive decorations, but a few strategic elements make a significant difference.

Your decoration shopping list:
Create a detailed list organized by store to minimize multiple trips
Purchase themed decorations: banners, balloons, table settings, etc.
Buy necessary party supplies: plates, cups, napkins in coordinating colors
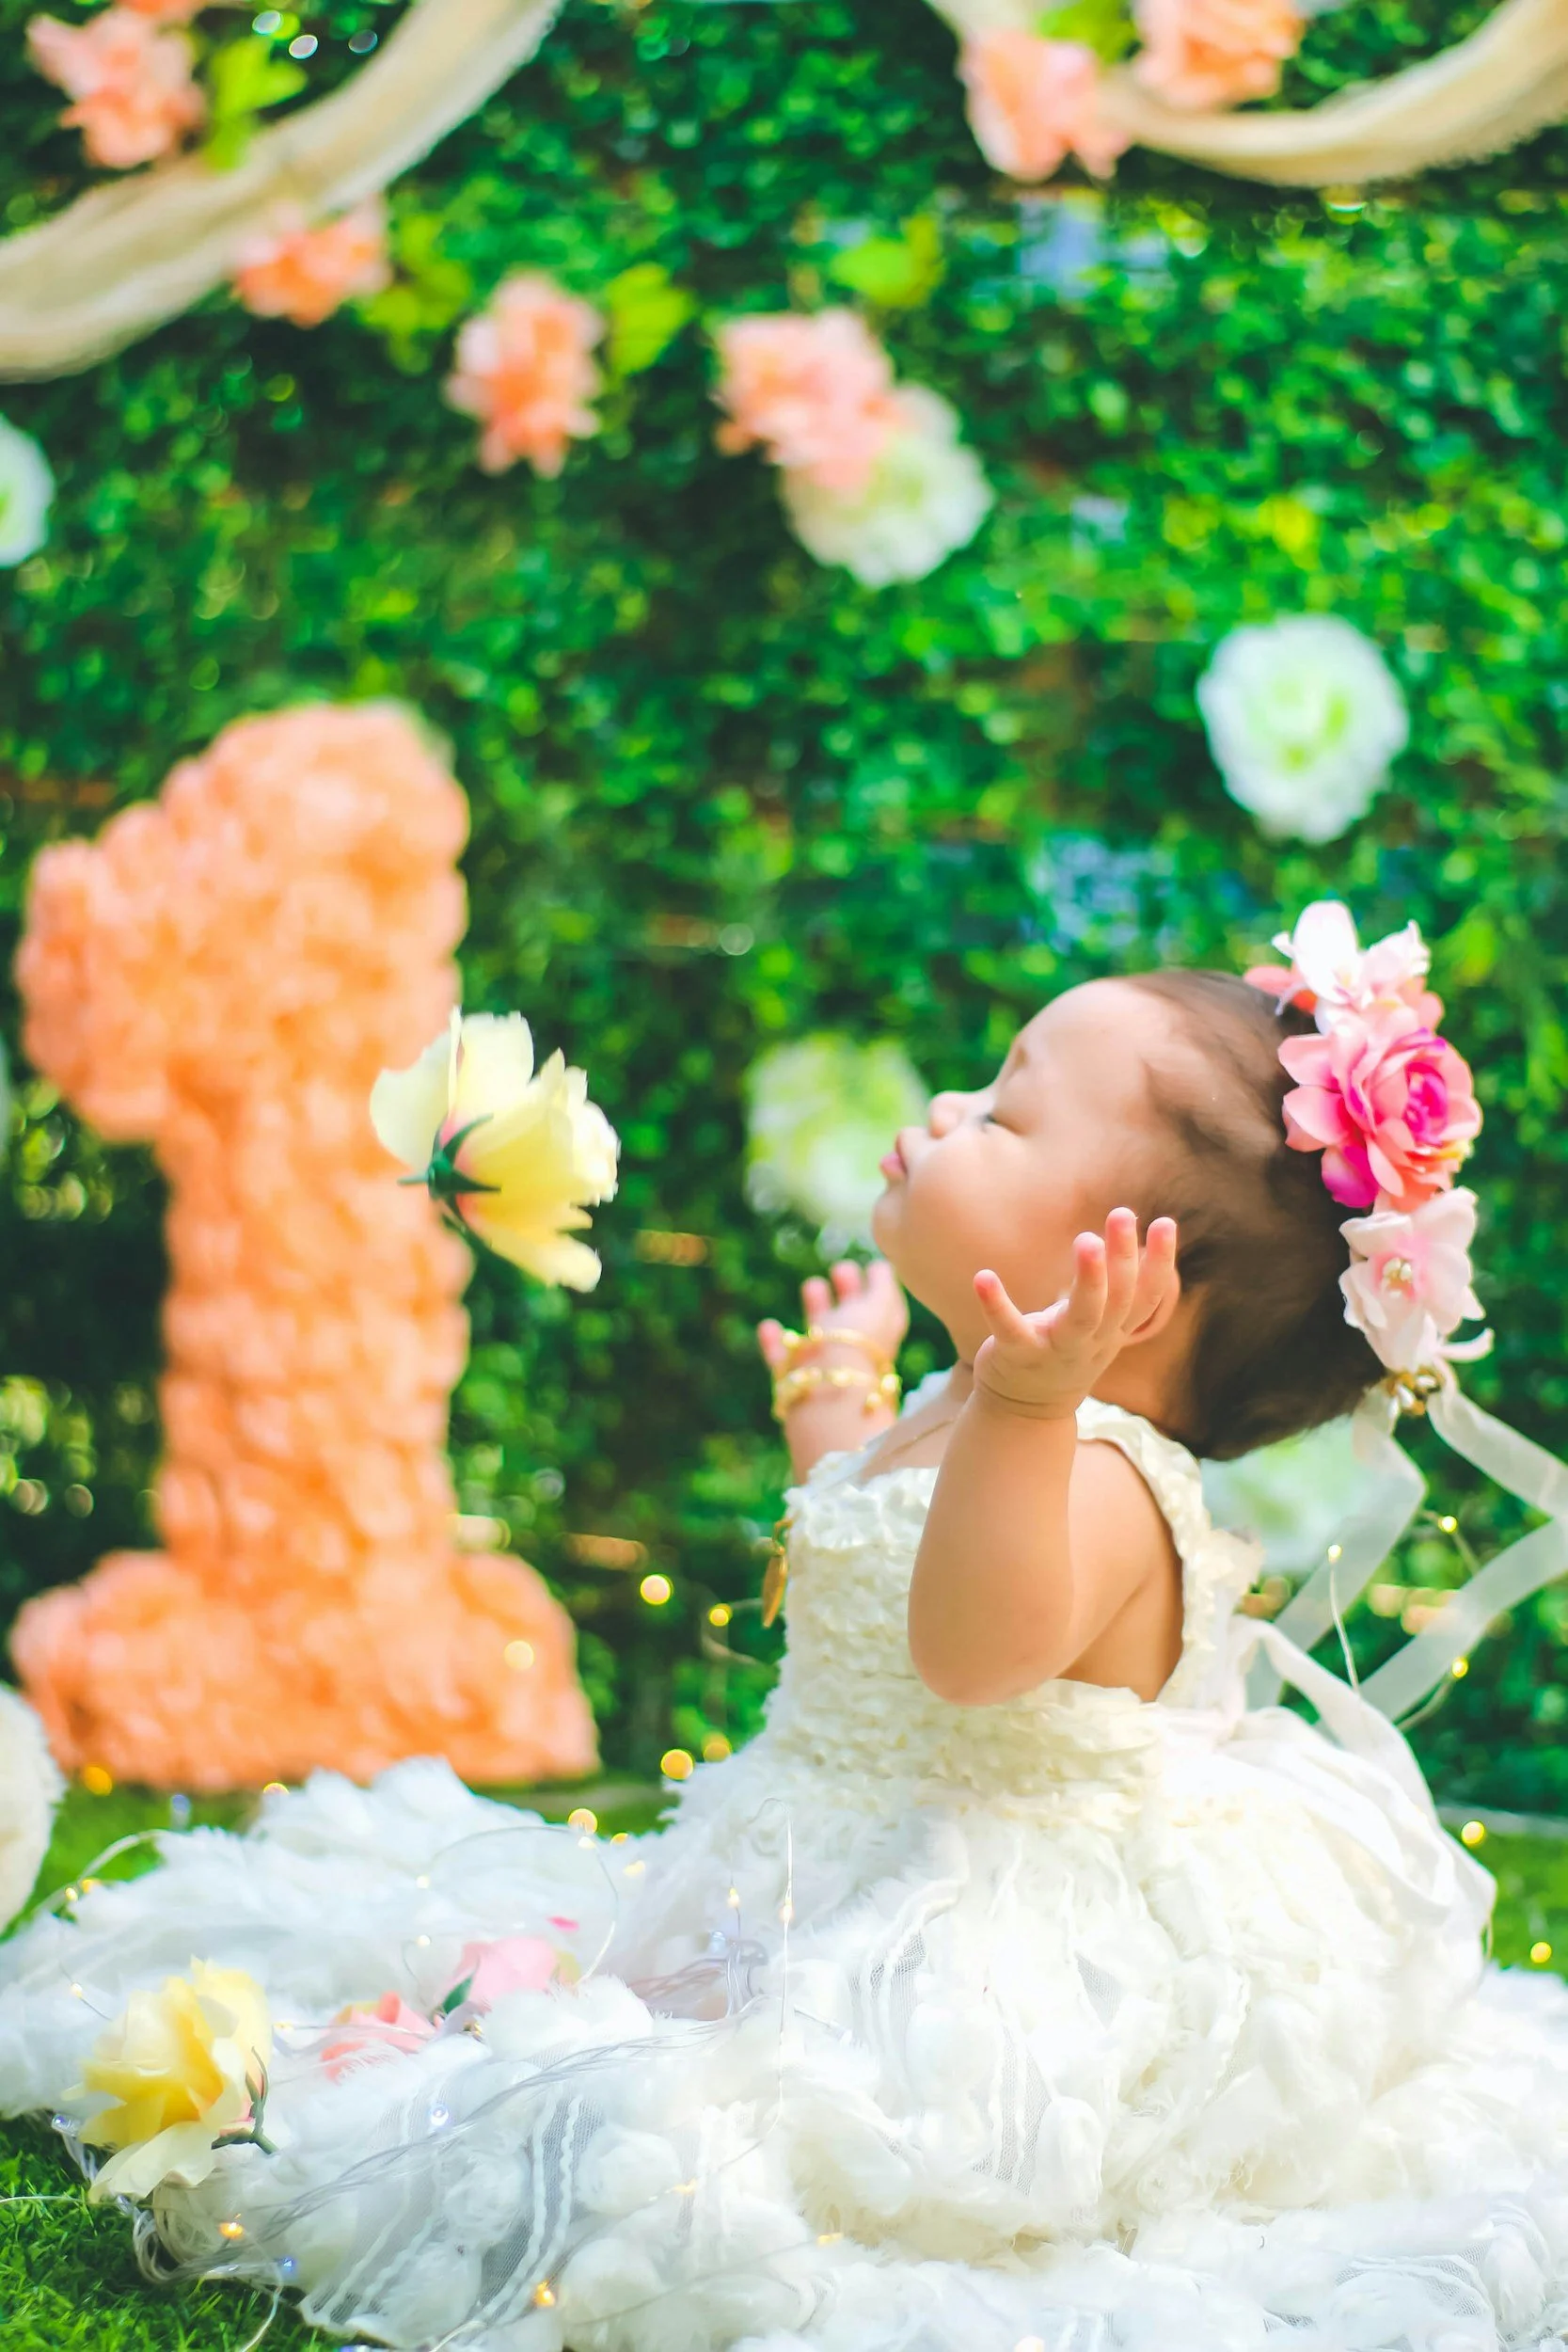
Order or create a "1" or "ONE" photo prop for pictures - a meaningful keepsake
Gather materials for any DIY decorations (tissue paper pom-poms are simple yet effective)
Select an appropriate birthday outfit for your child
Prepare party favors if desired (these are optional)
Create or order a milestone poster or photo display highlighting your baby's first year
I found unexpected savings when I discovered a party supply store holding a clearance sale. Consider checking Amazon, discount stores, or even online marketplaces where parents often sell barely-used decorations after their own celebrations.

Step 6: Plan Activities and Entertainment (2 Weeks Before)
Realistically, one-year-olds require minimal entertainment, but older children and adults might appreciate planned activities. Having a flexible schedule with a few simple activities maintains good flow throughout the event.
Activity planning checklist:
Create an hourly timeline including key moments like food service and cake time
Plan 2-3 simple activities appropriate for babies and young children
Gather supplies for your planned activities in advance
Designate a photo area with good lighting and appropriate props
Select background music or entertainment elements
Prepare a backup plan for indoor activities if weather concerns arise
Create a comfortable space for opening gifts if this will occur during the party
For my niece's celebration, we created a simple sensory play area with textured toys that was very popular with the younger guests.
We also set up a photo area with props that entertained older children and adults. The most successful activities require minimal explanation or setup while keeping guests engaged.

Step 7: Finalize Details and Prepare (1 Week Before)
The final week involves confirming details and handling last-minute preparations. This period often brings both excitement and moderate stress. Numerous small details require attention, but organization remains key.
Your one-week countdown checklist:
Follow up with any guests who haven't responded
Confirm final numbers with your venue and/or food providers
Create a detailed shopping list for perishable food items
Prepare cameras and clear memory storage - you'll likely take more photos than anticipated
Prepare any food items that can be made ahead and stored
Finalize your day-of schedule and share with helpers
List last-minute tasks for the day before and day of the event
Stock extra essentials (napkins, wipes, etc.) as spills are inevitable

Despite careful preparation for my son's party, I realized the night before that I had forgotten to purchase ice for beverages. This necessitated a late-night store visit.
Now I create comprehensive checklists covering all necessities, regardless of how obvious they might seem.
Step 8: Set Up and Decorate (1-2 Days Before)
This is when transformation occurs. Preparing your space is one of the most satisfying aspects of party planning. Try to complete as much as possible the day before to avoid rushing on the day of the celebration.
Setting up and decorating:
Clean and prepare your space thoroughly
Arrange tables, chairs, and major decorative elements
Organize the food service area and designate a special location for the cake
Create designated areas for activities, photos, and gifts
Prepare a welcome area with any guest book or memory items
Assemble favor bags or thank you gifts if applicable
Ensure all electronic devices are charged (speakers, cameras, etc.)
Complete any advanced food preparation
During my first hosting experience, I attempted all decorate the morning of the event, which proved challenging. I was still hanging decorations when early guests arrived. Now I complete everything possible the day before, which makes the celebration day much more relaxed.

Note that balloons generally last longer when inflated the day of the party rather than the previous day.
Step 9: Enjoy the Big Day (Party Day)
After all your planning, the celebration day has arrived. Now it's time to celebrate your child and enjoy the event yourself. This special day passes quickly, so try to be present and appreciate the moments.
Party day approach:
Arrange help for last-minute setup and food preparation
Set out perishable foods shortly before guest arrival
Ensure your baby is well-rested and fed before the event begins
Welcome guests and direct them to food and activities
Capture photographs or coordinate with your designated photographer
Follow your timeline while remaining flexible based on your baby's mood
Schedule cake time when your child is likely to be most content
Ask someone to record gift information if opening presents during the party
During my daughter's celebration, I was so occupied with hosting responsibilities that I took very few photos. For my son's party, I designated my sister as photography coordinator, and I'm grateful for those preserved memories.

Remember to give your camera to someone else occasionally so you appear in some photographs too.
Step 10: Capture Memories and Send Thanks (1-2 Weeks After)
The celebration concludes, but a few important tasks remain. This final step focuses on preserving memories and expressing gratitude to those who participated in your celebration.
After-party checklist:
Collect photographs from your photographer and guests
Send thank you notes for gifts and attendance
Create a photo collection of party memories
Save special keepsakes in your baby's memory box
Share selected photographs with guests
Make notes about successful elements for future reference
Record special moments while still fresh in your memory
After my son's party, fatigue led me to postpone writing thank-you notes for several weeks. This made recalling specific gifts and givers more difficult.

Now I document gift information immediately after the celebration while details remain clear.
Frequently Asked Questions
How much time do I need to plan a first birthday party?
Start 2-3 months ahead for venue bookings, or 1 month for simpler celebrations. Focus on location, food, cake, and basic decorations.
What's the ideal time of day for a first birthday party?
Schedule around baby's routine. Mid-morning (10-11:30am) or mid-afternoon (3-5pm) work best. Keep it to 2 hours maximum.
Are party favors necessary for guests?
They're optional. If provided, keep simple: decorated cookies, small plants, printed photos, or age-appropriate toys for children.
How can I plan a first birthday on a limited budget?
Serve cake and light refreshments, use digital invitations, make DIY decorations, choose free venues, and borrow equipment.
Should I hire a photographer or take photos myself?
A brief professional session captures valuable moments if budget allows. Otherwise, designate a skilled friend as photographer with a shot list.
Conclusion
Well done. By following these steps, you've created a meaningful celebration for your child's first birthday milestone. Photos from my own children's first birthdays still evoke emotion - they develop so quickly. While attractive decorations and good food enhance a celebration, what truly matters is commemorating this milestone with love. Your baby won't remember specific details, but will feel the joy surrounding them, and you'll have precious memories to revisit for years.
This first birthday celebrates not only your child's growth but also YOUR accomplishment as parents. Take a moment to reflect, enjoy those cake-covered smiles, and congratulate yourself - you've successfully navigated your first year of parenthood AND created a wonderful celebration.