15 Adorable Mother's Day Crafts from Baby That Mom Will Treasure Forever
Did you know that mostly new moms say handmade gifts from their babies are more meaningful than store-bought presents? There's something absolutely magical about receiving a gift made with your baby's tiny hands and feet—even if they can't quite grasp the concept yet.
As a mom of 5, I know firsthand how precious those early months are. Time flies impossibly fast, and before you know it, those adorable little fingers and toes have grown. That's why creating Mother's Day crafts from baby isn't just about the gift itself—it's about capturing a moment in time that you'll never get back. I still cherish the handprint art from my oldest, and now with my youngest, I'm soaking in every opportunity to create these keepsakes all over again.
Whether your little one is a newborn who's barely discovered their hands or a curious crawler exploring everything in sight, we've got you covered. This guide features 15 creative, safe, and age-appropriate crafts for kids that celebrate baby's first holiday.
And if you're looking for more ways to celebrate those precious early moments—from planning a memorable baby shower to building your baby registry checklist—we've got plenty of resources to help. Let's dive into these adorable ideas that transform tiny hands and feet into treasured memories.
This post may have affiliate links, which means I may receive commissions if you choose to purchase through links I provide (at no extra cost to you). As an Amazon Associate, I earn from qualifying purchases. Read more about these links in my disclaimer policy.
Getting Started with Mother's Day Crafts from Baby
Salt Dough Handprint Ornament
Salt dough handprint ornaments are considered the gold standard of baby keepsakes. The recipe is super simple: mix 2 cups of flour, 1 cup of salt, and 1 cup of water until you get a playdough-like consistency. I always make extra dough because you'll likely need multiple attempts to get the perfect handprint.
Here's the thing about getting baby's handprint in the dough—timing is everything. Roll out the dough about half an inch thick, then move quickly but gently. Press baby's hand firmly enough to capture those adorable finger details, but not so hard that you cause discomfort.
Here's my step-by-step process:
Roll out your salt dough on parchment paper (makes transfer easier)
Gently open baby's fingers and position their hand
Press straight down—don't wiggle or shift
Lift straight up to avoid smudging
Use a straw to poke a hole at the top for hanging
Bake at 200°F for 2-3 hours until completely hard
After it's baked and cooled, paint it with acrylics in mom's favorite colors, add baby's name and the date with a paint pen, and seal with clear varnish. I like using metallic gold or silver around the edges for an elegant touch. Mom can hang it anywhere—Christmas tree, bedroom wall, rearview mirror—and it becomes this tangible reminder of baby's first Mother's Day.
Pro tip: Make two while you're at it. One for mom, one for grandma.
Footprint Flower Bouquet Canvas
This footprint flower bouquet looks far more impressive than the effort it takes. Baby's footprints become flowers, with each little toe creating a petal. Start with an 11x14 or 16x20 canvas and choose 3-4 paint colors that complement each other.
Paint baby's foot completely, then press it onto the canvas with toes pointing up. The heel becomes the flower center, and the toes become petals. Repeat with different colors to create a whole bouquet.
Creating a complete garden scene:
Make 3-5 flowers using different colored footprints
Add green paint stems below each flower
Use baby's handprints for leaves if desired
Draw grass along the bottom with wavy lines
Include a sun in the corner if there's space
Once you've got your "flowers" printed, add stems with green paint. Add a sweet message at the bottom like "Love Grows Here" or "My First Mother's Day 2026" with baby's name. Frame it or leave it as a canvas—either way, this is a keepsake mom will treasure.
If you're looking for more Mother's Day gift ideas that won't break the bank, these handmade crafts are perfect alternatives to store-bought presents.
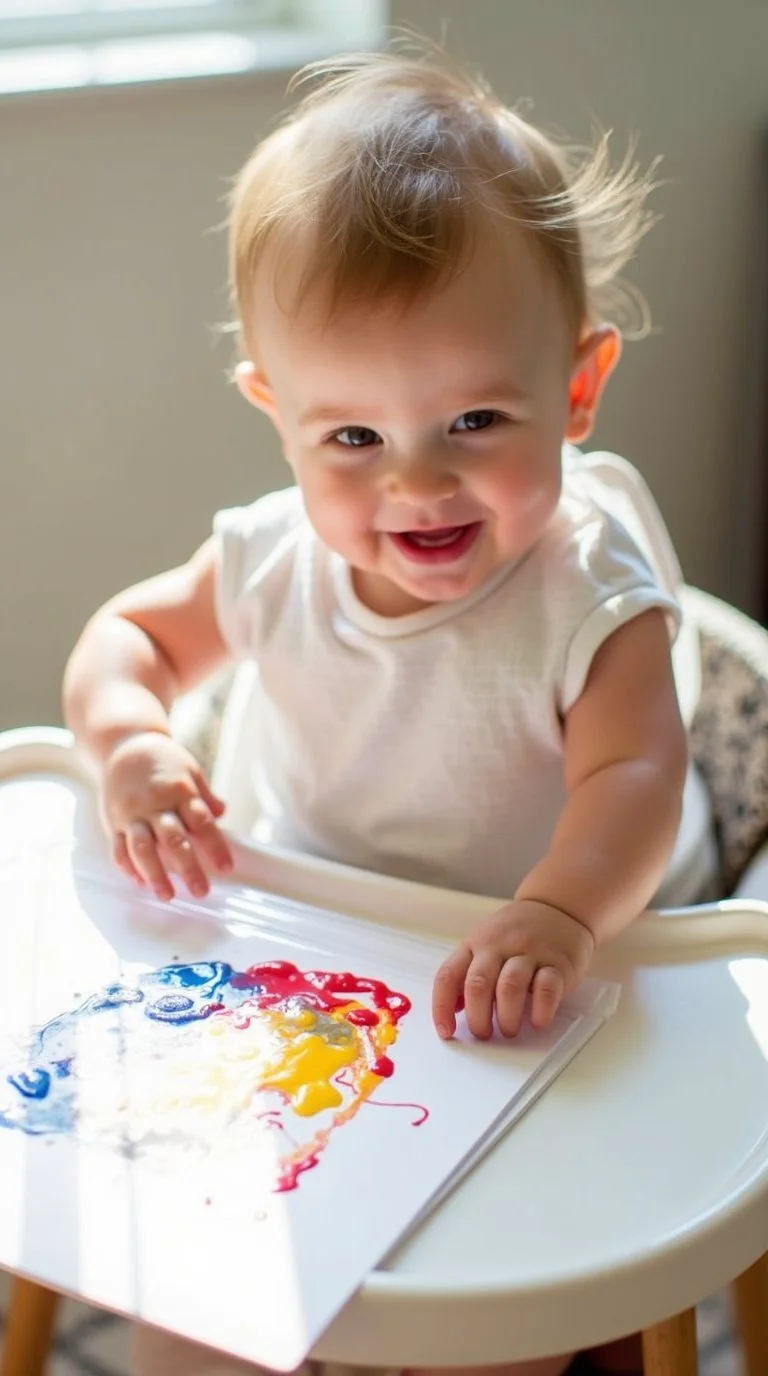
Mess-Free Sealed Bag Painting
Sealed bag painting literally saved my sanity when I had a baby who wanted to touch everything but couldn't handle getting messy yet. Grab a gallon-size freezer bag and squirt in 2-3 colors of paint, about 2 tablespoons each. Seal it carefully, then tape it down to the baby's highchair tray using masking tape on all four sides.
Why this craft works so well for babies:
Zero mess, zero stress
Safe for babies as young as 4 months
Baby can explore colors and textures without eating paint
Creates genuine abstract art from their natural movements
You can reuse the bag multiple times before the paint dries
Let baby squish and smear for as long as they're interested. When they're done, carefully open the bag and slide the painting out onto cardstock. Let it dry completely, then frame it. The colors blend together in ways you could never plan, creating something uniquely beautiful.
The mess-free aspect cannot be overstated. No paint in baby's hair, no scrubbing tiny fingers, no ruined onesies. For babies who put everything in their mouth, this is an ideal solution.
Thumbprint Pendant Necklace
This thumbprint necklace is something mom can literally carry close to her heart every single day. You'll need jewelry clay (like Sculpey or Fimo) or shrink plastic. Roll out a small ball of clay into a circle about the size of a quarter, roughly a quarter inch thick.
Gently press baby's thumb into the clay to capture those tiny ridges and whorls. You want enough pressure to see the detail, but not so much that you flatten it.
Steps for success:
Clean baby's thumb first so you get a clear print
Press straight down and lift straight up
Use a toothpick to make a hole for the chain before baking
Bake according to package directions (usually 275°F for 15-30 minutes)
Let it cool completely before handling
Once baked and cooled, leave it natural or paint it with metallics. Thread it onto a simple chain or leather cord, and you've created jewelry that mom will wear constantly. The thumbprint pendant works especially well for newborns because their prints are so tiny and detailed. This makes a perfect addition to any collection of thoughtful gifts for new mothers.
Handprint Calendar Keepsake
This handprint calendar is more involved than most projects, but you're creating a year-long gift that documents baby's entire first year of growth. Create a 12-month calendar where each month features baby's handprint in a different color. By December, that handprint will look noticeably larger compared to January.
What makes this calendar special:
Documents an entire year of growth
Functional gift mom uses every day
Can include family birthdays and important dates
Photos from each month make it even more personal
Becomes a cherished keepsake after the year ends
Start in January (or whatever month it is) and make a handprint. Then each month, add another handprint in a new color. Bind it together with ribbon or spiral binding. Add a cover page with baby's name and "My First Year." Include important dates mom cares about—pediatrician appointments, family birthdays, holidays.
Set a reminder on your phone to add the new handprint each month. The calendar serves double duty: it's useful for the current year, then becomes an incredible memory book afterward. For more ways to celebrate your first Mother's Day as a new mom, check out our complete guide.
Contact Paper Suncatcher
Contact paper suncatchers are beautiful, easy, and safe for even the youngest babies. You'll need clear contact paper, tissue paper in various colors, and scissors. Cut two identical shapes from the contact paper—hearts work great for Mother's Day.
Peel the backing off one piece and stick it to your work surface, sticky side up. Let baby "arrange" tissue paper pieces on the sticky surface. For very young babies, place them on their tummy near the contact paper and let them grab at the colorful pieces.
Perfect for different baby ages:
Newborns to 3 months: You arrange it while they watch
4-6 months: They can grab and place during supervised tummy time
7-12 months: They'll actively place and stick pieces
Once tissue paper covers most of the sticky surface, peel the backing off your second contact paper piece and carefully place it on top. Press firmly to seal, trim the edges, punch a hole at the top, add ribbon, and hang it in a sunny window. When the light comes through, it creates beautiful colored shadows and glowing effects.
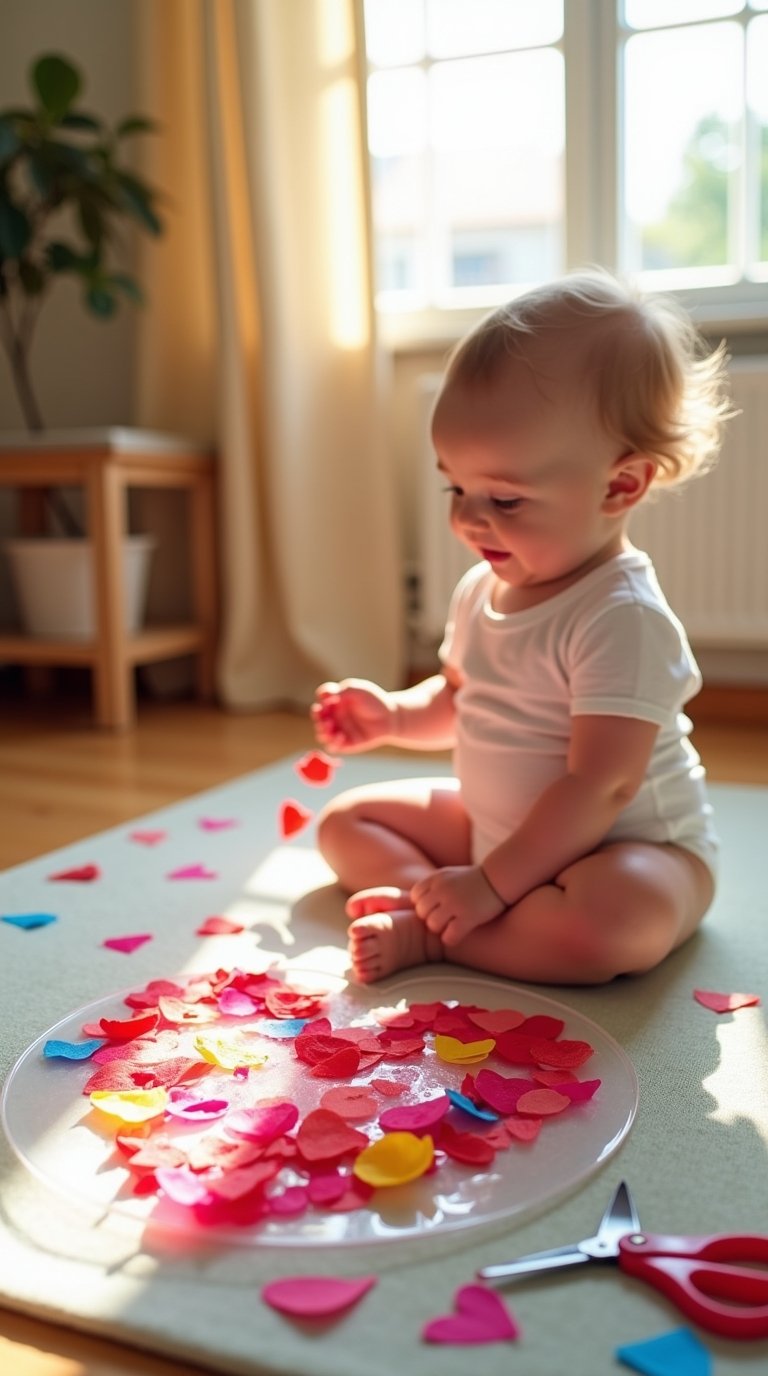
Photo Handprint Frame
The photo handprint frame combines the baby's artwork with an actual photo of mom and baby together. Buy a plain wooden frame for around $3 or use a cardboard frame. You need enough border space around where the photo goes to fit the baby's handprints.
Paint baby's hand with acrylic paint in mom's favorite color, then press their hand around the frame's border. I usually do one handprint on each side. Work quickly because the paint dries fast.
My technique for clear handprints:
Apply paint evenly with a foam brush
Press firmly but gently against the frame
Hold the baby's hand steady for 2-3 seconds
Lift straight up to avoid smudging
Have wipes ready for immediate cleanup
Once the handprints dry, add embellishments like rhinestones or ribbons. Write a message with a paint pen like "Mommy & Me" or "I Love You This Much." Pick a photo where mom and baby both look good—candid moments work better than posed photos. This frame becomes a fixture wherever Mom places it.
Fingerprint Flower Garden Card
If you're short on time, this fingerprint flower garden card takes about 10-15 minutes and requires minimal supplies. You'll need cardstock, washable stamp pads in different colors, and markers. Fold your cardstock in half to create a card.
Press baby's fingertip onto the stamp pad, then press it onto the card to create flower petals. Do this 4-5 times in a circle to make each flower. Use different colored stamp pads to create variety.
Creating a full garden scene:
Make 3-5 flowers using different colored fingerprints
Add green marker stems below each flower
Draw grass along the bottom with wavy lines
Include a sun in the corner if there's space
Baby's fingerprints are the main attraction
Once the flowers are done, add stems and leaves with green marker. Inside the card, write a sweet message in baby's "voice": "Dear Mommy, You help me grow just like these flowers. Happy Mother's Day! Love, [Baby's Name]." Pair this with some inspiring Mother's Day quotes to make it even more meaningful.
Handprint Flower Pot with Planted Seeds
This handprint flower pot keeps on giving long after Mother's Day. Mom gets baby's artwork AND a living plant she can nurture and watch grow. Start with a 6-inch terra cotta pot (costs around $2 at home improvement stores).
Paint baby's hands in bright colors and press them around the pot. I like doing 3-4 handprints in different colors spaced evenly. Let each color dry before adding the next one to avoid bleeding.
Best plants for this project:
Herbs like basil or mint (mom can use them in cooking)
Succulents (nearly impossible to kill)
Marigolds (cheerful and easy to grow)
Chives (useful and attractive)
Small flowering plants from the garden center
Once the handprints dry, add the baby's name and the year with a permanent marker. Fill the pot with potting soil, plant according to package directions, water it, and include care instructions on a tag. Mom can keep it in her kitchen window or on the porch where she'll see it daily. This is also a great gift idea under $20 that feels much more expensive than it actually is.
First Mother's Day Memory Box
The memory box becomes an incredible time capsule that mom will pull out years later when the baby's grown. Find a wooden or sturdy cardboard box around 8x10 inches. Decorate the outside with the baby's handprints, paint, and stickers.
Items to include in the memory box:
Hospital bracelet from the baby's birth
First outfit or coming-home outfit
Cards and letters from baby's birth
Photos from baby's first months
Monthly milestone cards if you've been documenting them
Special mementos like first lock of hair
A letter "from baby" to mom about this first Mother's Day
The letter is particularly meaningful. Write it in baby's voice, talking about what this first Mother's Day means and how much mom does. Date everything so years from now, mom knows exactly when things are from. This box becomes a tangible record of baby's earliest days.
For more ideas on celebrating a mom-to-be on Mother's Day, this memory box concept works beautifully for expectant mothers too.
Footprint Butterfly Art
Footprint butterflies work perfectly for babies of any age. The symbolism is sweet—butterflies represent transformation and growth. Paint both of baby's feet in coordinating colors, then press them onto paper side by side with the heels touching in the middle. This creates the butterfly wings.
Creating the complete butterfly:
Paint both feet the same or complementary colors
Press heels together in the center of your paper
Toes point outward to create wing shapes
Let the footprints dry completely
Add body and antennae with markers or paint
Once the footprints dry, add the butterfly body between the two heel prints and draw two antennae. Add details to the wings if you want—dots, stripes, swirls. Include a message like "Watching you spread your wings" or "My little butterfly, [Date]." Frame it for nursery-worthy wall art that captures the exact size of baby's feet at this moment. You can also create printable Mother's Day keepsakes to accompany the physical artwork.
Handprint Poem Keepsake
Combining baby's handprints with a touching poem about motherhood is guaranteed to be emotional. "Sometimes You Get Discouraged" is one of my favorites because it acknowledges how hard parenting is while celebrating those tiny handprints. "Hand Prints" is another popular choice.
Choose your poem based on what resonates with you. Print it out in a nice font or write it by hand if your handwriting is decent.
Design options for handprint poems:
Handprints arranged as a heart around the poem
Handprints as a tree with the poem below
Handprints as flowers with the poem in the center
Handprints on either side framing the poem text
Create this on thick cardstock or canvas for durability. Add baby's handprints using acrylic paint in colors that complement the overall design. Include baby's name, age in months, and the date. Frame it nicely—this becomes wall art that mom will read repeatedly, especially on challenging parenting days. For more inspiration, explore our collection of first-time mom quotes.
Sensory Ribbon Tag Frame
The sensory ribbon tag frame serves two purposes: it's a beautiful keepsake for mom AND a functional sensory toy for baby. Start with a basic picture frame and remove the glass. Collect a variety of ribbons in different textures—satin, grosgrain, burlap, lace, patterned cotton. Cut them into 4-6 inch strips.
Attaching the ribbons:
Hot glue works best for permanent attachment
Space ribbons evenly around the frame
Mix up textures and colors for variety
Make sure ribbons are securely attached
Fold each ribbon in half to create a loop
Add baby's handprints to the corners of the frame using acrylic paint. Choose a photo of mom and baby for the frame. Babies in the 3-10 month range love exploring those ribbon tags while mom displays a precious photo. As baby gets older, it transitions into just being a beautiful keepsake frame.

"Reasons I Love Mommy" Handprint Book
This little handprint book is incredibly sweet and surprisingly easy to make. It's a mini book where each page features baby's handprint and a reason why baby loves mommy. Use cardstock pages hole-punched and tied together with ribbon, or use a small scrapbook album.
Create 6-10 pages, each one featuring a different "reason" along with baby's handprint in different colors. Keep the reasons sweet and specific to mom.
Reason ideas specific to mom:
"Your bedtime songs that help me sleep"
"The way you laugh when I make funny faces"
"Your hugs when I'm sad or scared"
"How you always know what I need"
"Dancing with me in the kitchen"
"Your patience on hard days"
Write everything in baby's voice: "I love your silly songs" feels more personal than "Mom sings songs." Add photos of mom and baby throughout. Bind the pages together with ribbon or small book rings. Add a cover page that says "Reasons I Love Mommy by [Baby's Name]" with the date. This heartfelt gift pairs wonderfully with fun Mother's Day activities you can plan for the special day.
Handprint Growth Chart Ruler
The handprint growth chart ruler combines functional and sentimental. Mom can track baby's height over the years while having those precious early handprints preserved at the bottom. You'll need a wooden board about 5-6 feet tall and 6-8 inches wide. Sand it smooth, then paint or stain it in a color that matches mom's decor.
Creating the growth chart:
Add baby's handprints at the bottom with their birth stats
Paint measurement marks up the board (every inch or every few inches)
Number the measurements starting from the floor up
Add decorative elements like flowers, stars, or animals
Include family name or baby's name at the top
Seal everything with polyurethane for durability
The handprints at the bottom should include baby's birth length and weight, plus the date. As baby grows, mom can mark their height with the date. Add decorative elements that match the nursery or mom's style. Seal the whole thing with several coats of polyurethane to protect it for years. This becomes a family heirloom. Looking for more budget-friendly options? Check out our gift ideas under $30 and under $50.
Frequently Asked Questions
What's the safest paint to use for baby handprint crafts?
Use non-toxic, washable paints labeled safe for under 3 years. Crayola washable finger paints work well. For babies under 6 months, try edible alternatives like yogurt mixed with food coloring.
How do I get a good handprint from a newborn who won't open their fist?
Gently massage baby's palm for 30-60 seconds, try during sleep when hands relax, or stroke the back of their hand from wrist to fingers. Right after feeding also works well.
At what age can babies actually participate in crafts?
Newborns to 3 months: handprints/footprints only. 4-6 months: can grasp and explore textures. 6-12 months: more active engagement. Keep sessions 5-10 minutes maximum.
How can I preserve baby handprint and footprint art long-term?
Frame behind glass, use archival paper, seal clay/dough with 2-3 coats of varnish, store paper in protective sleeves away from sunlight, and take digital photos as backups.
What if my baby cries or refuses to do the craft?
Stop immediately. Try when baby is well-fed and rested, keep sessions to 5 minutes, or create crafts while they sleep. There's no rush.
Can I make Mother's Day crafts if I'm a single dad or grandparent?
Absolutely. These work for any caregiver celebrating a mother figure—mom, grandma, aunt, foster or adoptive mother. Adapt wording as needed.
How do I clean paint off my baby after crafting?
Use baby wipes, then warm water with mild baby soap. Baby oil removes stubborn paint. Do crafts before bath time and use washable paints.
Final Thoughts
Creating Mother's Day crafts from baby is so much more than just making a gift—it's about freezing time and capturing those fleeting moments when hands are small and feet are tiny.
Remember, perfection isn't the goal. Smudged paint, crooked lines, and messy edges are what make these crafts authentically beautiful. Mom won't care if the handprint was perfectly centered. She'll see the effort, feel the love, and treasure the memories captured in every imperfect detail.
Pick your favorite craft from the list, gather your materials, and create a Mother's Day gift that will be cherished for years to come. And don't forget to take photos of the process—those paint-covered baby hands are memories worth capturing too. Whether you're celebrating your first Mother's Day as an expecting mom or creating keepsakes as a new parent, these crafts are perfect for preserving precious memories.
For more support during your postpartum journey, check out our guides on postpartum recovery tips, postpartum gift baskets, and finding serenity through meditation as a new mom. And if you're looking for more celebration ideas, don't miss our suggestions for the best Mother's Day balloons, gifts for expecting mothers, and spring memory book ideas to document these special moments.