30+ Easy Handmade Christmas Cards with Kids
Did you know that handmade cards are kept 7 times longer than store-bought ones? There's something magical about Christmas cards crafted by little hands—the slightly crooked snowman, glitter everywhere, and those precious fingerprints you'll treasure forever.
As a mom of 5, creating handmade Christmas cards with kids isn't just about the final product. It's about those cozy afternoons at the kitchen table while tiny artists work on their masterpieces. From my experience juggling five different age groups, I've learned which projects actually work without the stress spiraling out of control.
If you're looking for more holiday inspiration beyond cards, check out my complete guide to Christmas crafts for kids.
This post may have affiliate links, which means I may receive commissions if you choose to purchase through links I provide (at no extra cost to you). As an Amazon Associate, I earn from qualifying purchases. Read more about these links in my disclaimer policy.
Why Make Handmade Christmas Cards with Kids
Making Christmas cards with kids gives back more than it takes. While cutting, gluing, and decorating, they're building fine motor skills without realizing it.
Creating handmade cards teaches gratitude and thoughtfulness. When kids make a card for someone, they think about what would make that person smile.
Key benefits:
Gets everyone off screens
Saves considerable money (store-bought cards cost $4-7 each)
Recipients treasure these cards more than purchased ones
Creates lasting family traditions
Reduces holiday stress by turning chores into quality time
Card-making naturally teaches patience. Kids can't rush—they must wait for glue to dry, think about design, and finish what they started.
Cost comparison: Making 20-30 cards costs $15-20 in supplies versus $100 for store-bought—that's 80-85% savings.
Essential Materials for DIY Christmas Cards
Start with basics and build from there. You don't need to spend $100 at craft stores.
Absolute essentials:
Cardstock or heavy construction paper (variety pack)
Regular construction paper in Christmas colors
Glue sticks (quality ones)
Child-safe scissors (one pair per kid)
Markers, crayons, or colored pencils
White envelopes
Level-up extras:
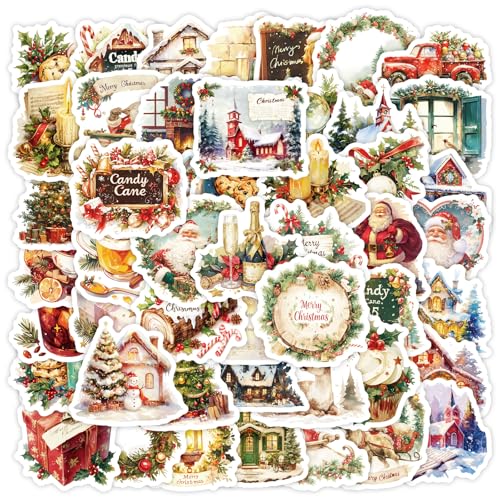
Christmas stickers
Pom-poms in red, green, and white
Pro tip: Organize everything BEFORE starting. Use plastic bins to sort supplies by type.
Great recycled materials:
Cereal boxes (perfect for templates)
Old wrapping paper and gift bags
Magazine pages
Junk mail with pretty designs
Cardboard from shipping boxes
Scrap fabric
Natural materials: Collect pinecones, small twigs, and evergreen sprigs during December walks. Ensure everything is dry before gluing.
For adhesives, invest in decent glue sticks. Cheap ones dry out quickly and don't stick properly. If you're looking for more holiday crafts that toddlers will love, check out our collection of age-appropriate projects.
Easy Handmade Christmas Card Ideas for Toddlers (Ages 2-4)
Toddlers have limited attention spans and fine motor skills, but they can make adorable cards. Keep it simple and focus on process, not product.
Fingerprint Christmas trees: Pre-fold cardstock. Put green washable paint on a paper plate. Let toddlers stamp fingers in a triangle shape. Add a brown trunk and dots for ornaments after drying.

Cotton ball snowmen: Let toddlers glue three cotton balls vertically. Add eyes, carrot nose, and stick arms with markers. Tip: Tear cotton balls in half—full ones are too thick.
Handprint reindeer:
Paint toddler's hand brown (washable paint)
Press onto card with fingers pointing up
Let dry completely
Add googly eyes, red pom-pom nose, and antlers
Potato stamping: Cut a potato in half, carve a simple shape, and let them stamp with Christmas-colored paint.
Keep sessions short: 15-20 minutes max. Dress kids in old clothes and cover work surfaces.
Sticker decorating: Perfect for "I don't wanna paint" days. Let them place stickers freely—47 on one card, none on another is fine. For more inspiration, explore our Christmas crafts for toddlers guide.
Creative Christmas Card Crafts for Preschoolers (Ages 4-6)
Preschoolers have better control than toddlers with 15-20 minute attention spans.
Paper plate Santa faces: Use paper plates, red construction paper, cotton balls, and markers. Kids cut out Santa hats, add cotton beards, and draw faces.
Popsicle stick Christmas trees: Paint three sticks green, glue in triangle shape, add sequins or beads as ornaments. Tip: Pre-paint sticks if possible.
Q-tip snowflake painting: Fold dark cardstock into cards. Let kids dot white paint with Q-tips to create snowflake patterns.
Cupcake liner wreaths:
Flatten 8-10 green cupcake liners
Arrange in a circle on card
Glue down
Add red buttons as "berries"
Draw or add a bow at bottom
Yarn-wrapped ornaments: Cut ornament shapes from cardboard, punch holes near top, let kids wrap colorful yarn around them.
Accordion-fold Christmas trees: Help kids fold green paper accordion-style, pinch in middle, fan out, and glue to card. Add star and glitter glue ornaments.

Button ornament cards: Draw ornament strings with marker, let kids glue buttons at bottom of each string.
Let them choose colors and designs. Purple Santas and orange Christmas trees encourage creativity.
Fun DIY Card Projects for Elementary Kids (Ages 7-10)
Elementary kids can execute complex ideas with dramatically improved attention spans.
Pop-up Christmas trees:
Fold cardstock in half
Make two parallel cuts from folded edge (2 inches long)
Push section inward for pop-up tab
Cut triangle tree, glue to tab
Decorate tree and background
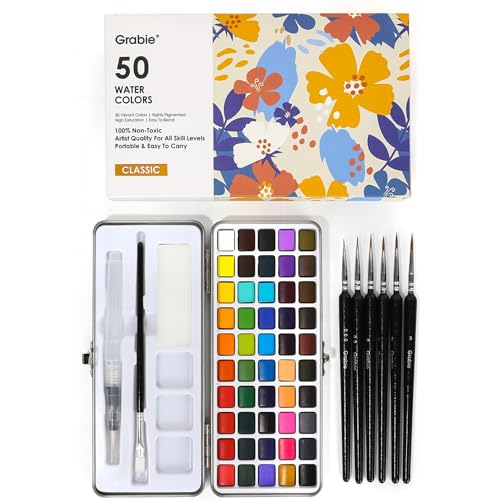
Watercolor winter landscapes: Use watercolor paints on heavy cardstock. Start with light wash for sky, add darker elements when dry. Tip: Sprinkle salt on wet paint for snowy texture.
String art stars: Punch holes around star shape, weave yarn through holes for geometric patterns.
Washi tape patterns: Layer tape strips in triangle for trees, create striped backgrounds, or make geometric designs. Great for kids who claim they're "not artistic."
Paper quilling ornaments: Roll thin paper strips into coils, pinch into shapes, glue onto cards. Takes 45-60 minutes per card but results are gorgeous. These techniques also work beautifully for DIY Christmas ornaments with children.
Photo cards: Kids cut photos, glue onto cards, decorate around them with drawings or stickers. Create "frames" using markers and patterns.
Mixed media designs: Combine techniques—watercolor backgrounds with marker details and washi tape accents. Every card turns out unique.
Balance guidance with creative freedom. Elementary kids can follow complex instructions but also have strong opinions about their creations.
Advanced Handmade Card Ideas for Tweens and Teens
Make card-making feel sophisticated for older kids.
Embossed metallic cards: Use embossing powder, stamp pad, stamps, and heat tool. Stamp design, sprinkle powder, shake excess, heat until melted. Warning: Heat guns get extremely hot—supervise this step.

Layered die-cut cards: Layer different cardstock colors with cut-out shapes. Use odd numbers of layers (three or five), offset slightly.
Watercolor lettering: Paint loose watercolor backgrounds, let dry, add hand-lettered messages with black markers or brush pens. Use 110lb cardstock to prevent warping.
Minimalist modern designs: Clean lines, white space, one color pop. Simple geometric trees or elegant single words like "Joy."
Stamping and heat embossing: Build patterns by stamping repeatedly. Try "emboss resist"—stamp and emboss in clear, then paint over with watercolors.
Origami elements: Fold tiny paper stars, cranes, or trees and attach for 3D effect. YouTube tutorials help teens teach themselves.
Digital-hybrid cards: Design elements in Canva or Procreate, print, then add handmade touches like ribbon or hand-lettered messages.
If teens get skilled, they can sell cards at craft fairs for $3-5 each. Respect their aesthetic preferences and don't hover—give them space to experiment. These skills also translate well into creating DIY Christmas gifts for family and friends.
Mess-Free and No-Glitter Christmas Card Options
Sometimes you need mess-free options for carpeted rooms or when you can't handle more glitter in the vacuum.
Crayon rubbing cards: Place textured objects under paper, rub with crayon side to create patterns.
Items that work:
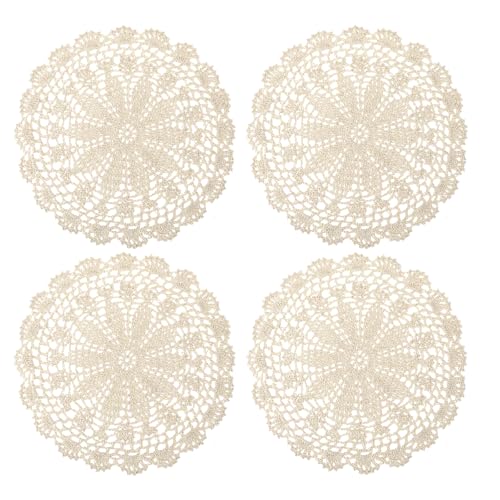
Lace or crochet doilies
Coins
Embossed cardboard
Craft store texture plates
Marker and colored pencil designs: Create gorgeous cards with just drawing tools. Use quality markers—cheap ones get frustrating.
Sticker scene cards: Build entire scenes using only Christmas stickers. Dollar stores have amazing sticker selections.

Stamp and ink pad cards: Use washable ink pads. Stamp on scrap paper first to test. Foam stamps are easier for younger kids.
Paper weaving: Cut slits in paper, weave strips through. Creates cool geometric patterns.
Tape resist designs: Place painter's tape in patterns, color over everything, peel tape for crisp white lines.
Magazine collage cards: Cut festive images from magazines and arrange on cards. Perfect for kids who say "I can't draw."
Pro tip: Keep a "mess-free craft kit" in your car with cardstock, markers, stickers, and washable stamps for waiting situations.
Budget-Friendly Christmas Card Making Tips
Crafting can get expensive, but it doesn't have to be.
Using recycled materials:
Cereal box cardboard for templates
Old wrapping paper scraps
Worn gift bags cut up
Junk mail with graphics
Cardboard from shipping boxes
Ribbon from gifts
Buttons from old clothes
Shopping at dollar stores:
Worth buying:
Cardstock packs
Sticker sheets
Foam stickers
Markers and crayons
Glue sticks
Ribbon and bows
Pom-poms and googly eyes
Not worth buying:
Scissors (dull quickly)
Paint (watery)
Glitter (chunky, doesn't stick)
Natural materials: Collect small pinecones, evergreen sprigs, twigs, pressed leaves, acorns during walks. Ensure everything is dry and bug-free.
Digital downloads: Pinterest, Teachers Pay Teachers, and Canva offer free templates. Mind copyright restrictions.
Supply swaps: Trade unused supplies with friends. Different age groups can exchange outgrown materials.
DIY alternatives: Make stamps from potatoes or craft foam instead of buying rubber stamps.
Cost breakdown (25 cards):
Cardstock (dollar store): $1
Construction paper (owned): $0
Stickers (dollar store): $2
Markers (owned): $0
Glue sticks (dollar store): $1
Envelopes (dollar store): $1
Embellishments (recycled): $0
Total: $5 = $0.20 per card
Compare to store-bought at $3-7 each = $75-$175 savings.
Pro tip: Buy supplies in January when craft stores put holiday items 70-80% off. If you're looking for more ways to save, check out our budget Christmas gifts for toddlers and homemade Christmas gifts under $20 guides.
How to Personalize Christmas Cards for Different Recipients
Tailor cards to specific recipients.
Cards for grandparents: Include handprints, footprints, or photos. Add specific memories: "I love when you make me cookies." Grandparents treasure personal touches.
Teacher appreciation cards: Include something specific learned: "Thank you for teaching me fractions." Keep school-appropriate—not too religious or secular.
Cards for friends: Get creative and goofy. Inside jokes and silly drawings work great.
Religious Christmas cards: Include nativity scenes, crosses, stars of Bethlehem, angels, or Bible verses like Luke 2:11.
Secular holiday cards: Focus on winter themes—snowflakes, snowmen, winter landscapes. Use "Season's Greetings" or "Happy Holidays."
Cards for distant relatives: Include family updates. Kids write about accomplishments: "I started soccer and scored 3 goals!"
Pet-themed cards: Include family pets in designs. Use paw prints, photos with Santa hats, or pets drawn as reindeer.

Teaching kids about audience builds empathy. Discuss who they're making cards for and what that person likes. For more personalized holiday ideas, explore our personalized Christmas gift ideas for mom collection.
Organizing a Christmas Card Making Party for Kids
Setting up crafting stations prevents chaos.
Stations (rotate every 15-20 minutes):
Station 1: Stamping and stickers
Station 2: Painting
Station 3: Collage and cutting
Station 4: Embellishments
Invitation checklist (2 weeks ahead):
Date, time, duration (2 hours max)
What you're providing vs. what guests bring
Dress code (messy clothes)
Number of cards per child
Sibling policy
Timeline:
0:00-0:15 - Arrival and setup
0:15-0:45 - First crafting session
0:45-1:00 - Snack break
1:00-1:30 - Second crafting session
1:30-1:45 - Finishing touches and cleanup
1:45-2:00 - Show and tell, pack up
Snack suggestions (craft-friendly):
String cheese
Apple slices
Crackers
Popcorn (individual bags)
Juice boxes
Candy canes
Adult supervision ratios:
Ages 4-6: One adult per 3-4 kids
Ages 7-10: One adult per 5-6 kids
Ages 11+: One adult per 8-10 kids
Take-home packaging: Use manila envelopes, pizza boxes, plastic page protectors, or magazine boxes labeled with kids' names.
Pro tips:
Pre-fold all cardstock
Set out extra supplies
Have a "mistakes box" for do-overs
Take breaks for handwashing
Prepare sample cards at each station
Looking for more party inspiration? Check out our kid-friendly Christmas party ideas and fun Christmas party ideas.
Teaching Moments While Making Christmas Cards
Card-making develops skills kids don't realize they're learning.
Color theory: Point out how colors interact. "Notice how red and green look bright together? They're opposite on the color wheel."
Spatial awareness: Ask questions about composition. "How does your card feel when everything is on the left? What if you moved this?"
Cultural traditions: Discuss different holidays and why "Happy Holidays" is inclusive. Make different card types.
Environmental consciousness: Talk about reusing materials and not wasting supplies. Use both sides of paper, save scraps. For more sustainable holiday ideas, see our green Christmas ideas.
Writing skills: Practice forming letters, spelling holiday words, expressing thoughts. Encourage meaningful messages beyond "Merry Christmas." Need inspiration? Browse our Merry Christmas wishes and messages.
Math concepts: Measuring, counting cards needed, creating symmetrical designs, dividing supplies evenly. Point out patterns and sequencing.
Following instructions: Multi-step projects teach sequencing. Break projects into chunks for kids who struggle.
Emotional intelligence: Think about recipients' feelings. "How will Grandpa feel opening this?" Teaches showing love through actions.
Learning emerges naturally from crafting. Be present for opportunities. The best learning happens from mistakes—discuss problem-solving when designs don't work.
Preserving and Displaying Kids' Handmade Cards
Photographing cards: Before giving away, photograph front and inside with good lighting. Organize photos by year in computer folders. Consider creating a Christmas family photo session around your card-making traditions.
Creating a portfolio: Keep one special card per kid per year in an artist portfolio case. Let kids pick favorites or choose ones capturing that age.
Framing favorites: Turn kids' art into holiday decor. Shadow boxes work for dimensional cards. Frame a new card yearly for a growing gallery. These work beautifully as part of your DIY Christmas home decorations.
Digital scrapbooking: Use Shutterfly or Chatbooks to create photo books of cards from multiple years.
Gift tags from cards: Cut decorative fronts after holidays, punch holes, add ribbon for next year's tags. Learn more how to wrap gifts beautifully with these repurposed tags.
Storage for finished cards: Use shallow plastic containers with dividers. Label sections: "School friends," "Family," "Neighbors."
Starting traditions: Block off "Card-Making Weekend" on your calendar. Create consistency kids anticipate. Discover more Christmas morning traditions with kids to build.
Time capsule idea: Seal one card per kid annually in dated envelopes. Open together when kids are grown.
Pro tip: Write notes on card backs before storing: "Age 5, obsessed with dinosaurs." Context makes cards more meaningful later.
Quality over quantity. Keep one perfectly preserved card per year rather than 50 in basement boxes.
Troubleshooting Common Card-Making Challenges
Glue disasters: Kids use too much glue. Demonstrate thin layers in dots or zigzags. For liquid glue, pour small amounts on paper plates, give kids cotton swabs to apply. Fix warping by placing cards between cardboard under heavy books overnight.
Glitter chaos:
Containment:
Use shallow bins or trays as glitter zones
Work over paper to pour excess back
Apply glue first, then sprinkle glitter
Use glitter glue pens instead of loose glitter
Do projects outside if possible
Cleanup: Damp paper towels and lint rollers pick up glitter effectively. Or skip glitter entirely—use sequins, metallic stickers, or shiny paper instead.
Attention span issues: Shorten projects, accept finishing over multiple sessions. Build in movement breaks after 15 minutes. Keep snacks nearby.
Perfectionism problems: Talk about art as expression, not perfection. Show mistakes in your work. Celebrate "happy accidents." Give practice materials first for kids who struggle.
Material shortages: Lay out all materials before starting. When shortages happen, get creative with alternatives. Keep a backup supplies box.
Sibling conflicts: Set ground rules: everyone gets own supplies, copying is flattery, no comparing. Give personal workspace. Pause activity if fights break out.
Drying time delays: Have multiple cards going. Work on one while another dries. Use hair dryers on cool setting to speed drying.
Envelope fitting issues: Measure envelopes FIRST, cut cards smaller. Standard A2 envelopes (4.375 x 5.75") fit 4.25 x 5.5" folded cards. Use padded mailers for dimensional cards.
Expect imperfection and embrace chaos. Cards won't look like Pinterest, and that's okay. The memory of making cards together matters most.
Conclusion
Creating handmade Christmas cards with kids is an investment in precious memories and childhood creativity. From fingerprint trees to watercolor designs, each messy, imperfect card becomes an irreplaceable treasure that recipients actually keep for years.
These sessions reduce holiday stress while teaching valuable skills like creativity, patience, and empathy. You'll save 80-90% compared to store-bought cards while creating cherished moments together.
Years from now, you'll treasure these memories—not the mess, but your child's pride in their creations. Pick one simple idea, gather your supplies, and embrace the beautiful chaos. The mess cleans up; the memories last forever.