30 DIY Christmas Ornaments with Children
Many families report stronger bonds when they engage in holiday crafts together. In fact, one survey found that 86% of parents say festive activities are among the best quality time they have with family each year. There's something magical about watching your child's eyes light up as they transform simple materials into treasured Christmas decorations.
From my experience as a mom of 5 kids, creating DIY Christmas ornaments with children builds memories that last a lifetime. I still treasure the lopsided paper snowflake my oldest made at four years old – it holds the place of honor on our tree fifteen years later.
Whether you need rainy day activities or budget-friendly decorations, homemade ornaments offer the perfect solution for every age group.
If you're looking for even more festive inspiration beyond ornaments, be sure to check out our complete guide to Christmas crafts for kids, and for year-round creative activities, explore our comprehensive collection of crafts for kids that will keep little hands busy in every season.
This post may have affiliate links, which means I may receive commissions if you choose to purchase through links I provide (at no extra cost to you). As an Amazon Associate, I earn from qualifying purchases. Read more about these links in my disclaimer policy.
Safety First: Essential Tips for DIY Christmas Ornaments with Children
Safety isn't just about avoiding cuts and burns – it's about ensuring everyone has fun without emergency room visits on Christmas Eve.
Age-Appropriate Tool Guidelines
Ages 2-4: Only safety scissors, washable glue sticks, and chunky crayons
Ages 5-7: Regular scissors with supervision, white school glue, markers
Ages 8-10: Craft knives with heavy supervision, hot glue gun (adult use only)
Ages 11+: Most tools with proper instruction and occasional supervision
Hot glue guns aren't appropriate for little hands. Use regular white glue or glue sticks for younger children – it takes longer to dry but nobody gets burned.
Creating Your Safe Crafting Zone
Cover your dining table with a plastic tablecloth (dollar store versions work perfectly). Here's a proven setup routine:
Clear a large, flat surface away from foot traffic
Cover with a washable material (plastic tablecloth or newspaper)
Place a damp towel nearby for quick cleanup
Keep a first aid kit within reach
Have all materials organized in easy-to-reach containers
Material Safety Guidelines
Non-toxic doesn't always mean safe for every age. Even "non-toxic" markers can cause upset stomachs if little ones decide they look tasty. Always check labels for age recommendations. For more tips on holiday decorations that are toddler-safe, check out our comprehensive safety guide.
Materials to avoid with young children:
Small beads (choking hazard for kids under 4)
Spray adhesives (fumes and mess)
Glass ornament bases
Wire thinner than 18-gauge
Any glitter smaller than chunky craft glitter
Emergency Preparedness
Keep these items in your craft area first aid kit: band-aids, antiseptic wipes, instant ice pack, and poison control number (1-800-222-1222).
Must-Have Materials and Supplies for DIY Christmas Ornaments
You probably already have half these items at home. Simple materials often work best with kids.
Basic Supply List
Essential materials for any Christmas ornament project:
Construction paper (invest in good quality – it's worth the extra dollar)
White school glue and glue sticks
Safety scissors for kids, regular scissors for adults
Washable markers and crayons
Hole punch (this will save your sanity)
String, yarn, or ribbon for hanging
Clear tape and masking tape
Budget-Friendly Alternatives
Dollar stores are goldmines for basic supplies. Instead of expensive craft foam, use cereal boxes cut into shapes. Instead of costly ribbon, cut fabric scraps into strips. Your kids won't know the difference. Looking for more budget Christmas gifts for toddlers? We've got you covered.
Recyclable Household Items
Great recyclable materials for ornaments:
Toilet paper and paper towel tubes
Egg cartons (especially cardboard ones)
Plastic bottle caps
Old magazines for cutting pictures
Cardboard from cereal boxes
Aluminum foil and pie tins
Old CDs (they make amazing sun catchers)
Shopping Tips
Buy supplies right after Christmas when everything goes on clearance. Store them in labeled bins for next year. Join craft store email lists for regular 40-50% off coupons.
Easy Christmas Ornaments for Toddlers and Preschoolers (Ages 2-5)
These projects keep things simple, safe, and achievable for short attention spans with boundless enthusiasm. For even more ideas, explore our collection of Christmas crafts for preschoolers.
Paper Plate Angel Ornaments
This reliable project works even with cranky toddlers on rainy December afternoons.
What you'll need:
Paper plates (sturdy ones, not flimsy)
Coffee filters
Crayons or markers
Glue sticks
Hole punch
Ribbon or string
Step-by-step process:
Let them color the coffee filters first (keeps them busy while you prep)
Help them glue the colored coffee filter to the paper plate for the dress
Draw or cut out a simple circle for the head
Let them add a face with markers
Punch a hole and add string for hanging
Expect everything to be crooked and covered in extra glue. That's what makes them perfect.
Handprint and Footprint Keepsakes
These ornaments make grandparents cry happy tears. The easiest version uses salt dough – just flour, salt, and water. They're perfect for commemorating your first Christmas with baby.
Simple salt dough recipe: Mix 2 cups flour, 1 cup salt, and enough water to make non-sticky dough.
Roll it 1/4 inch thick, press little hands or feet into it, use a straw to make hanging holes. Air dry 24-48 hours, then let them paint however they want.
Construction Paper Christmas Trees
All you need is green construction paper, scissors, glue, and decorations.
Simple steps:
Cut triangle shapes for the tree
Glue triangles onto another piece of paper
Add a brown rectangle for the trunk
Decorate with stickers, crayons, or small paper circles
Punch a hole and add string
No two trees look alike, and that's exactly how it should be.
Salt Dough Ornaments with Cookie Cutters
Kids love rolling dough and using cookie cutters, plus results look quite nice when finished. If you enjoy baking with your little ones, try our easy holiday baking with kids guide too.
Reliable salt dough recipe:
2 cups all-purpose flour
1 cup salt
1 cup water (add slowly)
Mix until smooth. If sticky, add more flour. If crumbly, add more water. Let kids roll out and use cookie cutters to create shapes.
Popsicle Stick Snowflakes
These look complicated but aren't. You need popsicle sticks, white glue, and maybe glitter.
Take three popsicle sticks and glue them in a star pattern. Let dry completely – the hardest part because kids want to touch everything immediately. Once dry, add glitter, stickers, or paint dots.
Warning: you'll find glitter everywhere for weeks. But kids love it, so the sparkly aftermath is worth it.

Fun Holiday Crafts for Elementary School Children (Ages 6-10)
This age group is ideal for Christmas crafting. They follow directions consistently, handle slightly complex tools, and have longer attention spans. Find more Christmas crafts for kids that work for this age range.
Beaded Candy Cane Ornaments
This requires patience but produces impressive results. You need pipe cleaners, red and white beads, and ribbon for hanging.
Process:
Start with white pipe cleaners (bend easier than colored ones)
String beads in pattern: three white, three red, repeat
Once full of beads, bend into candy cane shape
Twist end to keep beads from falling off
Add small loop at top for hanging
Buy extra beads – they roll everywhere and disappear easily.
Felt Gingerbread People
Perfect for kids learning to sew or wanting something different from paper crafts.
Materials needed:
Brown felt (inexpensive craft felt works fine)
Buttons for decoration
Embroidery floss or thick thread
Large plastic needles (safer for kids)
Simple gingerbread person template
Kids trace template onto felt, cut two pieces, then sew together with large stitches. Perfect stitching isn't the goal – character is.
Pine Cone Animals and Characters
Pine cones are free (if accessible) and make fantastic character bases.
Pine cone reindeer:
Use small twigs for antlers
Add googly eyes and red pom-pom nose
Hot glue everything together (adults only)
Add ribbon for hanging
Pine cone Santa is another winner – add red felt hat, cotton ball beard, and tiny black buttons.
Mason Jar Lid Snow Globes
While not technically tree ornaments, they're engaging to make and great teacher gifts. These also make wonderful Christmas gift ideas for mom or grandma.
What you'll need:
Mason jar lids (just the lids)
Small figurines that fit inside
Glycerin (available at craft stores or pharmacies)
Glitter or fake snow
Strong glue
Water
Glue figurine to inside of lid. Fill with water, add glycerin drops (slows "snow" fall), sprinkle glitter. Screw lid tightly, turn over and shake – instant snow globe.
Paper Quilling Christmas Designs
Requires patience but manageable for this age. Paper quilling involves rolling thin paper strips into coils and shapes, then gluing them into designs.
Cut construction paper into thin strips with a paper cutter (cheaper than buying quilling paper). Start with simple shapes like Christmas trees or stars. Show them how to roll paper around a pencil, then let them experiment.
Advanced DIY Ornament Projects for Tweens and Teens (Ages 11+)
Older kids handle complex materials and follow multi-step instructions without getting distracted easily.
Wire-Wrapped Crystal Ornaments
Creates professional-looking ornaments that teens actually want to make.
Materials needed:
20-gauge craft wire (thinner wire is too flimsy)
Small crystals or attractive rocks
Wire cutters
Small pliers
Ribbon or cord for hanging
Cut 12 inches of wire, wrap around crystal leaving long ends, twist ends into decorative spirals. Add loop at top for hanging. These look beautiful in windows where light hits the crystals.
Embroidery Hoop Holiday Wreaths
These became some of my favorite ornaments, discovered accidentally with leftover embroidery hoops. They complement any DIY Christmas home decorations perfectly.
Materials:

Small embroidery hoops (3-4 inch diameter)
Ribbon
Small decorations like buttons or bells
Hot glue gun
Wrap fabric around hoop and glue down. Add ribbon, small ornaments, or whatever appeals. They're sophisticated enough for year-round display.
Polymer Clay Miniature Scenes

Polymer clay seems intimidating but is quite forgiving. Create tiny Christmas trees, miniature snowmen, little houses – whatever imagination produces.
Clay bakes in home oven at 275°F for about 15 minutes per 1/4 inch thickness.
Helpful tips:
Condition clay by kneading until soft
Work on parchment paper for easier cleanup
Use acrylic paint after baking for details
Seal with clear varnish for durability
Macramé Christmas Ornaments
Macramé is trendy and relaxing once you learn basics. The boho-chic style mixes well with traditional Christmas ornaments.
Start with simple patterns like basic Christmas tree shapes or stars. You need macramé cord (cotton works best), scissors, and patience. YouTube tutorials show basic knots.
Upcycled Vintage Ornament Makeovers
Perfect for teens who enjoy thrift shopping or have access to old ornaments needing refreshing. These make fantastic homemade Christmas gifts under $20.
Ideas that work well:
Strip old paint and repaint with metallic colors
Add modern patterns with painters tape and spray paint
Wrap with trendy materials like twine or fabric
Add contemporary elements like geometric patterns
Even mistakes usually look better than the original condition.

Nature-Inspired Christmas Ornaments Using Outdoor Materials
There's something special about bringing outdoors inside for Christmas. Most materials are completely free. For more eco-friendly ideas, check out our green Christmas ideas guide.
Pine Cone Holiday Decorations
The key is finding good pine cones – look for fully opened ones that aren't too brittle.
Pine cone preparation:
Collect on dry days (wet pine cones close up)
Bake at 200°F for 30 minutes to eliminate bugs
Let cool completely before crafting
Pine cone Christmas trees are straightforward – paint green and add small beads or sequins. Pine cone owls are charming – add felt wings and googly eyes.
Twig and Branch Rustic Ornaments
Rustic styling fits current farmhouse aesthetics. Look for straight-ish twigs about pencil thickness.
Star ornaments process:
Cut five twigs the same length (4 inches works well)
Arrange in star pattern
Use thin wire or strong thread to tie together at each point
Add hanging loop at one point
These look beautiful alone or wrapped with lights for extra appeal. They also work wonderfully as part of your Christmas wreath ideas for the front door.
Preserved Flower and Leaf Ornaments
Requires planning since you need to press flowers and leaves ahead of time, but results are stunning. Start collecting and pressing leaves in early fall.
To press flowers and leaves:
Place between parchment paper sheets
Put inside heavy books
Wait 2-3 weeks for complete drying
Store carefully until ready to use
Once pressed, you can:
Laminate between clear contact paper
Frame in small embroidery hoops
Glue onto clear glass ornaments
Make bookmarks that double as gift tags
Rock Painting Christmas Characters
Rock painting is meditative, accessible, and produces impressive results. Look for smooth, flat rocks that are easy to paint.
Christmas rock ideas:
Santa faces on round red rocks
Snowmen using white paint and black details
Christmas trees on triangular rocks
Candy canes on long, thin rocks
Use acrylic paint and seal with clear spray varnish. Add wire or strong glue to attach hanging loops.
Coastal Holiday Themes with Shells
If you live near coast or have vacation shells, these make unique ornaments that evoke summer memories during cold winter months.
Shell angel ornaments:
Use large shell for body/dress
Small shell for head
Thin shells or shell pieces for wings
Pearl or small bead for halo
Hot glue everything together
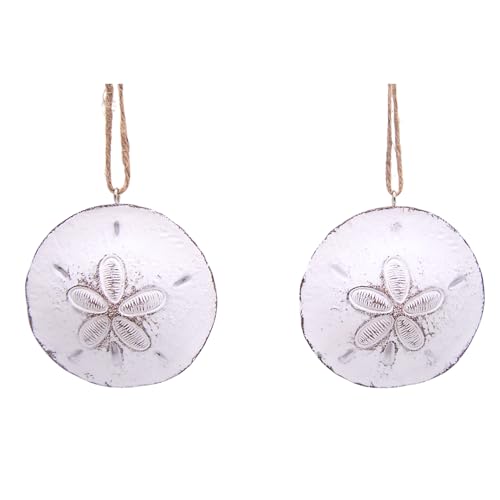
Sand dollar snowflakes are another winner – paint white and add glitter for frosty appearance. They're naturally beautiful with perfect star shapes.
Edible Christmas Ornaments: Sweet Treats for the Tree
Warning: edible ornaments don't last long on trees with curious kids (or adults with sweet teeth). But they're enjoyable to make and add special touches to holiday decorating. For more delicious ideas, explore our easy Christmas cookie recipes.
Gingerbread Cookie Ornaments
The most traditional edible ornaments, popular for centuries. The key is dough that holds shape and doesn't puff excessively while baking.
Reliable gingerbread recipe:
3 cups flour
2 teaspoons ginger
1 teaspoon cinnamon
1 teaspoon baking soda
1/2 teaspoon cloves
1/2 teaspoon salt
1/2 cup butter
1/2 cup brown sugar
1/2 cup molasses
1 egg
Mix dry ingredients, cream butter and sugar, add molasses and egg, then combine everything. Chill dough at least one hour (crucial for keeping shapes crisp). Roll out, cut shapes, and make holes for hanging before baking. These also work great for Christmas cookies decorating with children.
Popcorn and Cranberry Garland
This classic is more challenging than it appears. The trick is using strong needle and dental floss instead of regular thread.
Tips that work:
Use day-old popcorn (less likely to crumble)
Fresh cranberries work better than dried ones
Make garland in sections, then connect them
Keep extra cranberries handy – some will split
Be patient with this project. It takes longer than expected, but the old-fashioned charm is worthwhile.
Candy Cane and Pretzel Wreaths
These look complicated but are easy. You need mini pretzels, green melting chocolate, and small candies for decoration.
Melt chocolate, dip pretzels to coat, arrange in wreath shapes on parchment paper, add small candies before chocolate hardens. Kids enjoy helping because they eat the "broken" pieces.
Chocolate-Dipped Spoons
These make excellent ornaments and teacher gifts. Use plastic spoons, dip in melted chocolate, then roll in crushed candy canes or sprinkles.
Let harden on parchment paper, then wrap in clear cellophane bags with ribbon. They look sophisticated but take 10 minutes to make a dozen. Perfect for last-minute Christmas gifts!

Safety with Edible Ornaments
Practical considerations: they attract bugs and pets, don't last long, and can make messes if they fall. But they're traditional, fun, and smell wonderful on your tree.
Safety points to remember:
Don't leave the tree more than a week
Keep away from heat sources (lights can melt chocolate)
Watch pets carefully – some ingredients can harm them
Have a disposal plan when they get stale
Memory-Making Ornament Ideas: Preserving Special Moments
These are the ornaments that matter most – the ones that tell your family's story and bring back specific memories every time you hang them. For more ways to capture memories, see our Christmas family photo ideas.
Photo Ornament Tutorials
Photo ornaments are probably the most meaningful decorations you can make. I have ones from when my kids were tiny that consistently make me smile (and sometimes emotional). They're also wonderful for personalized Christmas ornaments.
Simple photo ornament methods:
Mod Podge photos onto wooden discs
Insert photos into clear plastic ornaments
Create photo collages in embroidery hoops
Laminate photos and cut into shapes
Use good quality photos that won't fade. Print on photo paper, not regular printer paper, and consider having extras made since these become family treasures.
Preserving Children's Artwork
Kids create abundant holiday artwork, but some pieces deserve to become permanent ornaments. These make thoughtful DIY Christmas gift ideas for grandparents too.
Ways to preserve artwork as ornaments:
Laminate special drawings and cut into shapes
Scan artwork and print on ornament-making materials
Use clear contact paper to protect paper crafts
Frame small pieces in mini frames with hanging loops
Ask kids which pieces they want to keep as ornaments. Sometimes the one you think is most important isn't the one they're attached to.
Time Capsule Ornaments
These are delightful to open years later. Use clear plastic ornaments that open and fill with small mementos from the current year.
Ideas for time capsule contents:
Tiny toys that were popular that year
Rolled-up lists of favorites (foods, songs, friends)
Small photos
Ticket stubs from special events
Pressed flowers from the garden
Write the year clearly on the outside, and plan to open in 5 or 10 years. It's like receiving a surprise from your past self.
Growth Tracking Ornaments
These documents show how much kids have grown each year. The simplest version is hand and foot print ornaments with years clearly marked.
Other growth tracking ideas:
Height measurements written on ribbon ornaments
Photos of kids next to the same object each year
Handwriting samples preserved in clear ornaments
Lists of accomplishments or milestones reached
Pet Memorial and Celebration Ornaments
Don't forget furry family members. Pet ornaments are special, whether celebrating current pets or remembering ones who've passed.
Simple pet ornament ideas:
Paw print impressions in salt dough
Photos of pets in special frames
Ornaments with pet names and years
Small toys that belonged to beloved pets
These might seem unnecessary, but pets are family, too, and having them represented on your tree feels right.
Frequently Asked Questions
What age is appropriate to start making Christmas ornaments with children?
Start at 18 months with finger painting or sticking pre-cut shapes. By 2-3, kids handle safety scissors and simple assembly. Match complexity to attention span and motor skills, not just age.
How can I make ornament crafting less messy?
Use washable surfaces, keep wet wipes handy, choose construction paper over paint, have kids wear old clothes, and craft before bath time.
What's the best way to preserve children's handmade ornaments?
Wrap individually in tissue paper, store in sturdy boxes, laminate paper ornaments, and photograph each piece as backup memories.
How long do homemade Christmas ornaments typically last?
Salt dough ornaments last 10+ years, paper ones 3-5 years, fabric/felt decades. Proper storage and gentle handling extend lifespan significantly.
What if my child gets frustrated during ornament making?
Keep projects age-appropriate, break into small steps, celebrate imperfections, have backup activities ready, and abandon projects that aren't working.
Wrapping It Up
Creating DIY Christmas ornaments with children transforms craft time into extraordinary memory-making moments. From simple paper snowflakes for toddlers to intricate beaded designs for older kids, these projects suit every age.
The most beautiful ornaments aren't the most perfect ones. Those slightly crooked stars and enthusiastically glittered candy canes become treasured family decorations made with love and little hands. The giggles over spilled glue and children's pride when their creations grace the tree make the holidays truly magical.
Start simple and gradually tackle complex designs as skills develop. Embrace the mess, celebrate imperfections, and focus on creating together joyfully.