Personalized Christmas Ornaments DIY: 20+ Creative Ideas to Make Your Holiday Tree Uniquely Yours
Did you know that most families consider Christmas ornaments their most cherished holiday decorations? As a mom of 5, I can absolutely vouch for this—there's something magical about personalized ornaments that tell our family's story!
While store-bought ornaments are beautiful, nothing compares to handmade, personalized Christmas ornaments DIY projects. From my years of holiday crafting with my kids (yes, including glitter disasters!), I've learned these creations transform your tree into a gallery of precious memories.
Ready to create something special? From simple crafts for kids to elegant projects, discover how easy it is to craft personalized Christmas ornaments DIY style that become treasured family keepsakes!
This post may have affiliate links, which means I may receive commissions if you choose to purchase through links I provide (at no extra cost to you). As an Amazon Associate, I earn from qualifying purchases. Read more about these links in my disclaimer policy.
Essential Supplies for Personalized Christmas Ornaments DIY
Having the right supplies makes all the difference between ornament-making joy and total frustration. Here's what I keep stocked in my ornament-making toolkit:
Basic Must-Have Materials:
Clear glass or plastic ornament balls (buy in bulk at dollar stores)
Acrylic paints in festive colors (red, green, gold, silver, white)
Fine-tip permanent markers (Sharpies work great)
Mod Podge or similar adhesive sealer
Small paintbrushes in various sizes
Ribbon or twine for hanging loops
Glue gun with extra glue sticks
Paper and Cardstock Essentials:
Cardstock in holiday colors
Scrapbook paper with fun patterns
Double-sided tape (way better than regular tape)
Paper punches for perfect shapes
Laminating sheets for durability
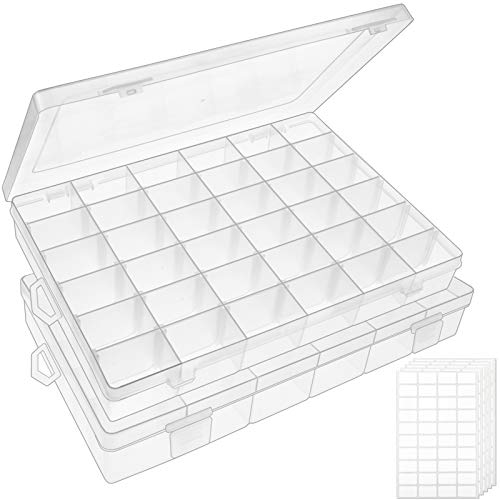
You don't need to break the bank. I've found great materials at thrift stores and clearance sections. Storage is a game-changer - use a clear plastic container with dividers to keep everything organized.
Safety note: If crafting with children, stick to non-toxic everything and always double-check labels. These personalized ornaments pair beautifully with other Christmas crafts for kids and can become part of your overall DIY Christmas home decorations.
Photo Personalized Christmas Ornaments That Capture Memories
Photo ornaments are like small time capsules on your tree. The easiest method uses clear glass ornament balls.
Step-by-Step Glass Ball Photo Ornament:
Choose photos that are roughly 3x4 inches
Print on matte photo paper (crucial for longevity)
Carefully remove the ornament cap
Roll the photo loosely and slide it through the opening
Use tweezers to position the photo inside
Replace the cap and add a ribbon for hanging
Try themed photo ornaments - "first day of school" photos, vacation memories, or yearly family portraits. Wooden slice ornaments are another fantastic option, using Mod Podge to attach photos directly to the wood surface.
Pro tip: Keep digital copies of every photo you use for ornaments in a special "Christmas Keepsakes" folder. Do all your printing at once for bulk savings.
Handprint and Fingerprint Christmas Ornament Ideas
Handprint ornaments are messy but worth it! Salt dough is my go-to recipe because it's cheap and lasts forever when sealed properly.
My Tried-and-True Salt Dough Recipe:
2 cups all-purpose flour
1 cup salt
1 cup water
Mix until it forms a smooth dough (takes about 5 minutes of kneading)
Roll dough to exactly 1/4 inch thick. Press hands firmly but gently for clear impressions. Use a straw to make hanging holes before the dough dries.
Fingerprint Design Ideas That Actually Work:
Snowmen (three fingerprints stacked vertically)
Reindeer (thumbprint for body, fingerprints for antlers)
Christmas trees (green fingerprints in triangle shape)
Holly leaves (red fingerprint "berries" with painted green leaves)
Use washable tempera paint for initial handprints, then acrylic paint for details after everything's dry. These DIY Christmas ornaments with children are perfect for holiday crafts with little ones!
Name and Initial Personalized Ornament Crafts
Writing names on curved ornament surfaces is trickier than it looks! Wood burning has become my favorite technique for permanent, rustic-looking letters.
Wood Burning Basics for Beginners:
Start with soft woods like pine or basswood
Practice on scrap pieces first
Use stencils or printed letters as guides
Work slowly and keep the pen moving
Sand lightly after burning for a smooth finish
Vinyl lettering gives a crisp, professional look. Use a credit card to smooth out letters without air bubbles.

Tips for Clean Hand-Lettering:
Use a fine-tip brush designed for detail work
Thin your paint slightly with water for better flow
Practice letter spacing on paper first
Work from left to right to avoid smudging
Let each letter dry completely before starting the next
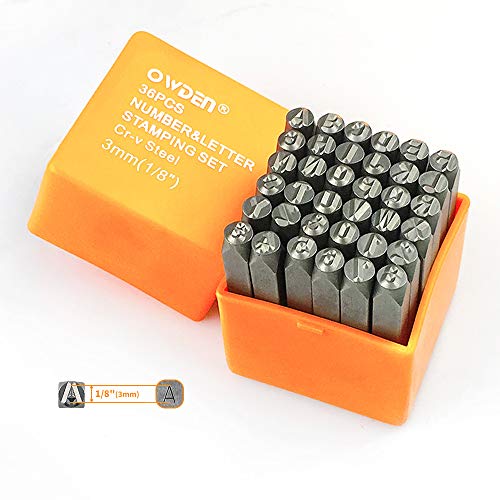
Metal stamping creates beautiful permanent impressions but requires proper tools for consistent results.
Family Milestone and Memory Christmas Ornaments
Commemorating life's big moments on your Christmas tree makes holidays feel extra special.
Baby's First Christmas Ornament Ideas:

Handprint in clay with birth stats written around the edge
Wooden block letters spelling out their name
Footprint impression with "First Christmas" painted above

Wedding anniversary ornaments, pet memorial ornaments, moving day ornaments, and achievement ornaments all create meaningful keepsakes. Keep a running list throughout the year and tackle them all in November during Christmas prep mode.
For expectant parents, these baby ornaments make wonderful additions to Christmas baby shower ideas or can be part of creative Christmas baby announcement ideas.
If you're planning a surprise announcement, consider incorporating personalized ornaments into your Christmas themed gender reveal ideas.
These special keepsakes are also perfect for celebrating your first Christmas with baby and can be thoughtful stocking stuffer ideas for baby.
Easy Paper and Cardboard Personalized Ornaments
Paper ornaments are lightweight, easy to customize, and budget-friendly. Some of my most treasured ornaments are made from paper!
Simple Paper Snowflake Name Technique:
Fold paper into eighths (like traditional snowflakes)
Draw your name letters along the fold lines
Cut carefully with a sharp craft knife
Unfold and back with contrasting colored paper
Add glitter while glue is still wet for extra sparkle
Cardboard photo frame ornaments showcase tiny school photos perfectly. Paper quilling creates amazing 3D designs that look more complicated than they are. Origami ornaments with hidden messages inside make sweet surprises.
Don't overlook newspaper, magazine, and brown grocery bag ornaments - they have a charming rustic, vintage look while reusing materials. These eco-friendly Christmas ideas are perfect for families wanting to celebrate sustainably!
Advanced DIY Techniques for Unique Personalized Ornaments
These techniques take more time and practice, but the results are impressive.
Glass Painting Success Tips:
Clean the surface with rubbing alcohol first
Use glass-specific paints (they're worth the extra cost)
Work in thin layers - thick paint looks goopy
Let each layer dry completely before adding details
Seal with glass sealer for durability
Etching cream creates frosted glass effects. Wood carving adds rustic charm to wooden ornament blanks. Resin casting lets you embed photos, pressed flowers, or small keepsakes inside clear ornaments.
Resin Casting Beginner Mistakes to Avoid:
Don't rush the mixing process - bubbles are your enemy
Work in a dust-free environment
Have everything ready before you start mixing
Use a heat gun to pop surface bubbles
Be patient - good resin work can't be rushed
Needle felting creates adorable 3D character ornaments. 3D printing opens up endless possibilities with custom shapes.
Start small and be patient with yourself. These advanced techniques require practice but create professional-looking results.
Gift-Worthy Personalized Ornaments for Loved Ones
Making personalized ornaments as gifts is more meaningful than generic presents. These handmade treasures make excellent DIY Christmas gift ideas and can serve as thoughtful stocking stuffer ideas for kids.
Teacher Appreciation Ornament Ideas:
Apple shapes with teacher's name and year
Mini chalkboards with sweet messages
Pencil-shaped ornaments with "Thanks for helping me learn"
Star ornaments labeled "Star Teacher"
Book-shaped ornaments with the teacher's favorite quote
Grandparent ornaments become treasured keepsakes. Try photo ornaments or handprint ornaments saying "Grandma's Little Hands." Best friend ornaments should include inside jokes and shared memories. Keep coworker gifts professional but thoughtful.
For busy moms looking for the perfect present, these ornaments complement other Christmas gift ideas for mom and work wonderfully alongside Christmas gift ideas for toddlers. You can also explore personalized Christmas gift ideas for mom or homemade Christmas gifts under $20 for budget-friendly options.
Gift Packaging Tips:
Use small white boxes that let the ornament be the star
Line boxes with tissue paper in holiday colors
Include a small card explaining the personalization
Add a ribbon that matches the ornament colors
Consider clear boxes so the ornament is visible

Give ornament gifts the first week of December so people can enjoy them all season long. These personalized ornaments become some of people's most treasured possessions. For more creative wrapping ideas, make your presentation as special as the gift itself!
Frequently Asked Questions
What's the best way to preserve handmade ornaments year after year?
Wrap each ornament individually in acid-free tissue paper and store in a climate-controlled closet. Avoid basements, garages, and temperature fluctuations that can crack salt dough and fade colors.
How far in advance should I start making DIY Christmas ornaments?
Start gathering supplies in October and begin crafting by early November. This prevents December stress and allows time for mistakes.
What's the most durable material for personalized ornaments that will last for years?
Ceramic and wood are most durable. Properly sealed salt dough ornaments can last decades with multiple coats of clear varnish. Paper ornaments are beautiful but typically last 3-5 years maximum.
Can I make personalized ornaments with very young children safely?
Yes! Use washable materials and simple designs. Salt dough is safe since it's edible. Stick to handprint ornaments for toddlers. Avoid small beads, sharp tools, and glass.
How do I add hanging loops to homemade ornaments?
For lightweight ornaments, make holes with a drinking straw before drying, then thread ribbon through. For wooden pieces, use a small drill bit. Eye screws work best for heavier ornaments—pre-drill pilot holes first.
Wrapping It Up
Creating DIY personalized Christmas ornaments weaves your family's story into holiday traditions. From handprint keepsakes to photo ornaments, each handmade decoration becomes treasured family history. The beauty lies in their imperfection—crooked letters and fingerprint reindeer "flaws" make ornaments priceless and irreplaceable.
Remember, joy comes from the making process as much as the final product. Gather your family, play Christmas music, and create lasting memories. Future you will cherish unpacking these keepsakes yearly, each transporting you back to creation moments.
Pick techniques that excite you most and begin your personalized ornament adventure today!