Master the Art of Paper Quilling into Stunning Designs
Have you ever wondered how delicate paper art comes to life with just paper strips and simple tools? As a mom of 5, I've discovered that paper quilling transforms ordinary paper into extraordinary three-dimensional masterpieces—my perfect creative outlet during quiet moments after bedtime.
This ancient art form dates back to the Renaissance era when nuns and monks decorated religious artifacts. Today, quilling has experienced a remarkable renaissance, with modern crafters discovering its therapeutic benefits. From my experience juggling household chaos, even 15 minutes of quilling provides the perfect mental reset.
This guide explores paper quilling basics, and once mastered, it becomes one of those wonderful crafts for kids for family activities.
This post may have affiliate links, which means I may receive commissions if you choose to purchase through links I provide (at no extra cost to you). As an Amazon Associate, I earn from qualifying purchases. Read more about these links in my disclaimer policy.
What is Paper Quilling?
Paper quilling is the art of rolling thin strips of paper into coils and shaping them into beautiful designs. The term "quilling" comes from the quill feathers originally used to roll the paper strips.
Quilling isn't just one uniform style. You've got traditional quilling that focuses on:
Tight, precise coils that appear almost geometrically perfect
Symmetrical patterns and classical designs
Religious and decorative motifs
Delicate, intricate work requiring significant patience
Then there's contemporary quilling which opens up more creative possibilities:
Loose, organic shapes that feel more natural and flowing
Mixed media combinations with other art forms
3D sculptures and dimensional art pieces
Modern color palettes and abstract designs

Quilling appears deceptively simple but offers incredible versatility. You can create everything from delicate greeting card embellishments to large-scale wall art installations.
What surprised me most was how meditative the process becomes. The repetitive rolling motion becomes almost hypnotic - it's my personal form of paper therapy.
Essential Quilling Tools and Materials Every Beginner Needs
You don't need every tool available when starting out. Here's what you actually need:

The slotted quilling tool is absolutely your most important investment. It resembles a tiny sewing needle with a slot cut in the top. This tool makes rolling coils significantly easier than attempting to do it by hand or with improvised tools.

Your second essential tool is a needle tool - basically a thin needle mounted in a comfortable handle. You'll use this for applying glue with precision and making fine adjustments to your coils. Some people try to use straight pins, but the proper handle makes a substantial difference during longer crafting sessions.
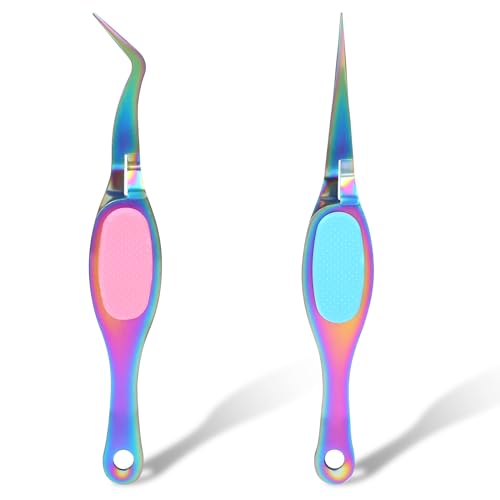
Fine-tip tweezers are crucial for handling small pieces without getting adhesive all over your fingers. I learned this lesson when I accidentally glued my thumb to a particularly stubborn teardrop shape.
Paper Quality Matters
Investing in good materials really pays off:
Paper Strip Widths:

3mm strips: Perfect for detailed work and miniature flowers
5mm strips: Most commonly used size, excellent for general projects
10mm strips: Ideal for larger coils and bold design elements
1/8 inch strips: Good alternative if metric sizes aren't readily available
Quality quilling paper is typically 120-160 GSM. Regular copy paper is too thick and cardstock is too heavy. For adhesive, use PVA glue - it dries clear and doesn't wrinkle the paper.
Basic Starter Shopping List
Slotted quilling tool ($3-5)
Needle tool ($2-4)
Fine-tip tweezers ($3-6)
Pack of mixed-color 5mm quilling strips ($8-12)
Small bottle of PVA glue ($2-3)
Quilling board or template ($5-10)
Total investment: approximately $25-40 to get started properly.
Fundamental Quilling Techniques
Let's get into the practical skills - creating shapes. I'll walk you through fundamental techniques that form the foundation of every quilling project. Don't be discouraged if initial attempts look uneven.
The Tight Coil
Insert your paper strip into the quilling tool slot and roll steadily. Keep tension consistent - not too loose or tight. When you reach the strip's end, apply a small glue dot to secure.
The key is maintaining consistent pressure. Too much pressure tears the paper. Too little and the coil unravels when released. It took me around 20 attempts to achieve a properly round coil.
Loose Coils
Loose coils are more challenging than tight ones. Roll using the same technique, but before applying glue, release tension to let the coil expand. Final size depends on how much you let it relax. I typically aim for about a quarter-inch diameter.
Essential Shapes to Practice:
Teardrop: Gently pinch one side of a loose coil
Marquise: Pinch both sides of a loose coil to create pointed ends
Square: Pinch four evenly-spaced points around the circumference
Triangle: Create three evenly-spaced pinch points
Heart: Make a teardrop, then carefully indent the round end
Crescent: Pinch one side and curve it slightly
The teardrop shape gave me trouble for weeks. The issue was pinching too aggressively and crushing the coil structure. The pinch should be gentle but firm - think of shaping soft clay.
Scrolls and Advanced Techniques
Scrolls add graceful flair to projects. Instead of complete coils, roll each strip end in opposite directions, leaving the middle straight. S-scrolls and C-scrolls are most common. These took considerable practice to make symmetrical.
Eccentric circles are coils where the center is intentionally off-center, producing a spiral effect. Achieve this by pushing the center of a loose coil to one side before applying glue.
Practice basic shapes in dedicated sessions rather than making complete projects immediately. Spend 30 minutes making teardrops, then another session on marquise shapes. Your muscle memory develops faster, and future projects look more professional.
Step-by-Step Beginner Quilling Projects
Here are projects that won't leave you feeling overwhelmed or frustrated.
Simple Flower Design (Ideal First Project)
You'll need approximately 10 strips in two complementary colors plus green for the stem.
Begin with the flower center using a tight coil in your darkest color, roughly pea-sized. For petals, create five teardrops using loose coils expanded to about ¼ inch diameter.
Focus on one petal at a time, applying a tiny glue dot where it connects to the center. Hold each piece for 10 seconds to let adhesive set.
The stem is simply two green strips twisted together. Nothing complicated, but creates a nice finishing touch when mounted on a card.
This type of simple craft is perfect for building confidence while creating something beautiful. Like many paper crafts, quilling flowers make excellent decorative elements for greeting cards and scrapbook pages.

Greeting Card Embellishments
Cards are excellent for beginners because small imperfections add "handmade charm."
For a birthday card, consider making:
Three to five simple flowers in varying sizes
A few green leaves (pinched marquise shapes work perfectly)
Some decorative scrolls for visual interest
Avoid overcrowding your design. In quilling, less is more effective.
Basic Monogram Letters
Letters are more complex than they appear because you need to plan flow and structure carefully. Start with simple letters like "C," "O," or "S" that follow natural curves.
For straight lines, use "on-edge" rolling where you roll the strip on its side instead of flat. This creates different texture and cleaner straight edges.
The most valuable lesson: "perfect" shouldn't be your immediate goal - "finished" should be.
Advanced Quilling Techniques for Experienced Crafters
Once you've developed confidence with basics, quilling becomes genuinely exciting creatively.
The Husking Technique
Husking creates realistic-looking leaves and petals by weaving paper strips around template patterns. You'll need pins and either a corkboard or foam pad.
Place pins in a leaf outline, then weave your paper strip back and forth around pins in a specific pattern. My first successful husked leaf required 45 minutes. With practice, I can complete one in 10 minutes.
Fringing for Realistic Textures
Instead of solid paper strips, make numerous tiny cuts along one edge before rolling. When rolled, fringed strips produce fluffy, dimensional effects perfect for flower centers.
Make consistent cuts - approximately 2mm apart, cutting 3/4 through the strip width. Use small embroidery scissors.
3D Quilling Projects
Instead of flat designs, you're constructing dimensional sculptures. The challenge is understanding how paper strips behave when curved and under structural stress.
Use:
Graduated coil sizes for natural curves
Strategic glue placement for structural integrity
Temporary supports while pieces dry
Careful assembly order planning
Typography and Lettering
Quilled letters require different approaches than standard techniques. Consider overall design flow and plan how each letter connects.
Start by sketching intended letters, then planning which techniques work best for each section. Curved letters like "S" and "O" are easier than angular ones like "A" or "M".
Creative Project Ideas to Inspire Your Quilling Journey
Wall Art That Looks Professional
The key to successful wall art is working in manageable sections and planning focal points. Start by sketching at actual size, then break into logical sections.
A typical 8x10 piece might include:
One main focal point (large, detailed flower)
Supporting elements (leaves, smaller flowers, decorative scrolls)
Background filler elements (simple coils, basic scrolls)
A cohesive color scheme
Quilled Jewelry Experiments
The solution involves multiple coats of clear protective sealant to shield paper from moisture and wear.
I've successfully created:
Pendant earrings using large teardrop shapes
Statement rings with dimensional flower tops
Hair accessories featuring tiny quilled flowers
Decorative bookmark tassels
The biggest challenge is weight distribution. Learn to hollow out larger pieces or use lightweight foam cores.

Wedding and Special Event Decorations
This is where quilling demonstrates its potential for special occasions. The scale required pushes you to think bigger and work more efficiently.
Seasonal and Holiday Projects
Holiday-themed quilling represents some of my most enjoyable work because you can embrace bold colors and festive themes. Always begin holiday projects well in advance as they tend to be more complex.
Troubleshooting Common Quilling Problems
Coil Disasters and Solutions
Paper strips can develop weak spots if bent during storage. Always inspect strips before beginning and check for damaged areas. Cut out weak spots or save for projects where imperfections won't be noticeable.
For inconsistent tension, practice with shorter strips until you develop proper muscle memory.
Adhesive Application Problems
Here's what I learned about proper glue application:
Less is consistently better - a tiny drop is sufficient
Apply glue to your work surface, not directly to paper
Allow each connection to dry for at least 30 seconds
If glue seeps out, clean immediately with slightly damp cotton swab
Color Bleeding Issues
The usual culprit is cheap paper or excessive workspace moisture. Test all color combinations on small scraps first, especially when mixing different paper brands.
Shape Consistency Challenges
For repeated shapes, develop a template system. Trace the first successful piece onto cardboard and use as a guide.
Work in batches rather than completing one element at a time. Create all centers first, then all petals, then all leaves for more uniform results.
The Problem of Wonky Circles
This happens when paper strip isn't feeding evenly or you're not maintaining consistent rolling angle. Pay attention to hand position and ensure strip feeds straight without twisting. Roll on a smooth surface - I use glass from an old picture frame.
Every mistake teaches something important about how paper behaves, how adhesives work, or how tools respond to different techniques.
Frequently Asked Questions
Q: How long does it take to learn paper quilling?
You can learn the basic shapes in about an hour of focused practice, but developing real skill takes several weeks of consistent work.
Q: What type of paper is best for quilling?
You need specialized quilling paper strips that are typically 120-160 GSM weight. The most common and useful widths are 3mm, 5mm, and 10mm.
Q: Can children do paper quilling?
Absolutely, and it's actually excellent for developing fine motor skills and patience. The main thing to monitor is glue usage - children tend to use far too much and create sticky messes everywhere.
Q: Is quilling expensive to start?
Not really - it's actually one of the more budget-friendly paper crafts you can take up. You can get started with basic tools and adequate supplies for under $30.
Q: How do I fix mistakes in quilling?
It depends on the specific type of mistake. If a coil comes apart, you can usually re-roll it successfully if the glue hasn't completely set.
FINAL THOUGHTS
Paper quilling offers incredible creative possibilities with simple materials. The meditative process, combined with stunning results, makes it a rewarding hobby for beginners and experienced crafters alike.
Start with basic coils and shapes, be patient during the learning process, and don't hesitate to experiment. The welcoming quilling community is ready to support your journey.
Gather some paper strips, a slotted tool, and prepare to discover how engaging this ancient art form can be. Your friends and family will be amazed at what you can create with just paper, glue, and patience.